Are you using video on your brand’s homepage? If not, you may be missing an opportunity. Video has a unique ability to catch attention, tell a story, and convince people to take action.
Whether you work for a retail brand, a university, a nonprofit or a software company, your organization needs an engaging homepage video to explain what you do, and why anyone who visits your website should care.
Why should you put video in the spotlight on your website?
According to a study by Animoto, 76.5% of professional marketers and small business owners that have used video marketing say it has had a direct impact on their business. The same study found that 1 in 4 respondents feel behind the competition when it comes to video marketing. Jumping in and creating a killer explainer video for your homepage can help you get ahead of the game.
Plus, research shows that 64% of customers are more likely to buy a product online after watching a video about it.
What are you waiting for?
How to make an explainer video your visitors will love
Making a killer video for your homepage can be daunting. Where do you start? How long will it take to produce? What kind of equipment do you need?
Here’s the good news. I’m writing this post because we just finished producing a 2 minute overview video for the PhotoShelter for Brands (formerly Libris) homepage, and we took notes as we went along. Now, we’re flipping the script and sharing what we’ve learned.
In this post, we’ll cover:
- Pre-Production: What to do before you start shooting, including research, script writing and storyboarding
- Production: How to shoot your video, including what equipment to use and how to have a smooth shoot day
- Post-Production: How to edit your video, including how to log and edit your footage, how to tweak your video based on feedback and how to choose the right music
- Publish: How to share your video with your audience and measure impact
As we go along, I’ll also share pro tips and how long each of these steps took our team.
Let’s dive in!
Pre-Production: What to do before you start shooting
Research
The first step you need to take is to figure out what your target audience is looking for. What are their pain points? What will resonate with them? And how can your product, service, etc. improve their lives? The key here is to make sure you’re highlighting what your viewer thinks is important, not what you think is important.
My first move was to meet with our sales team. I asked them about our customers’ pain points, what they love most about working with us, and what gets a “wow” reaction when they’re showing people around our software.
They told me that the people we work with – photographers, videographers, marketers, creatives, etc. – get a ton of file requests, and they need to send large files to their stakeholders quickly. For them, our “Quick Send” feature is a lifesaver, because it lets them select a few files and send them straight to someone’s inbox in seconds.
“Quick Send” went on my list of points I had to hit in my script.
Pro Tip: Meet with the team members who know your customers best during the brainstorming phase so you can make a list of what matters most to your target audience.
With our latest homepage video, we weren’t starting from scratch. We were revamping our current homepage video, a 90 second overview about our product, to reflect our product’s new functionality. During this research phase, I also looked at the feedback we’ve gotten about the video, as well as the data. (If you don’t have an existing homepage video to analyze, I suggest looking at the stats from any of your existing videos and your website in general to see what you can learn from them.)
We use Wistia to host our video so we can track how people watch it. Check out our old homepage video’s engagement graph:
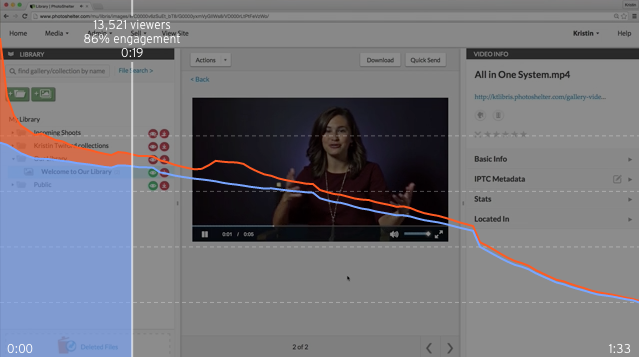
Typically, when you look at these engagement graphs, you’ll see a dropoff at the beginning of the video. Here, we were excited to see we held people’s attention past the first few seconds, and still had an 86% engagement rate at the 19 second mark (meaning 86% of the people who clicked play made it through 19 seconds of this video).
How’d we do it? We added a visual trick in the first few seconds of this video that held people’s attention – something that’s important to do in an age where people have shorter attention spans than goldfish. Check it out:
At the same time, we saw a steep dropoff after the 1:04 mark, which led me to investigate. Turns out, the video fades to our logo here, creating a fake-me-out ending. Then, it scrolls through titles of our website, music credits, and our logo (again!). It’s no wonder we’ve lost nearly all our viewers by the time our call to action appears 30 seconds later.
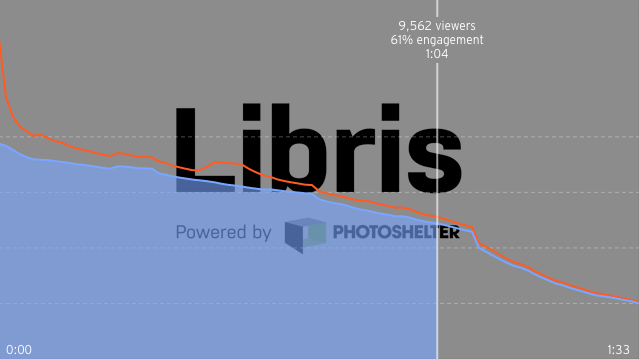
Now, my plan of action was clear: create a video that is action packed until the end, and drive viewers to our call to action right away. This would help the video convert at a higher rate.
Pro Tip: In the case of your homepage video, focus on engagement and retention, rather than view count. You want this video to hold your viewers’ attention and drive them to take action.
Keep in mind: According to Hubspot, the average video retains 37% of viewers all the way to the end, and the top 5% of videos retain an average of 77% of viewers to the last second.
Timing: The research phase is a bit harder to estimate, because it was spread out over time. I had three half-hour meetings with stakeholders and spent a couple of hours reviewing our data and feedback (which was readily available – I didn’t have to dig for it). I would estimate I spent four hours on research, but know this will vary based on how much data and feedback you collect on a regular basis.
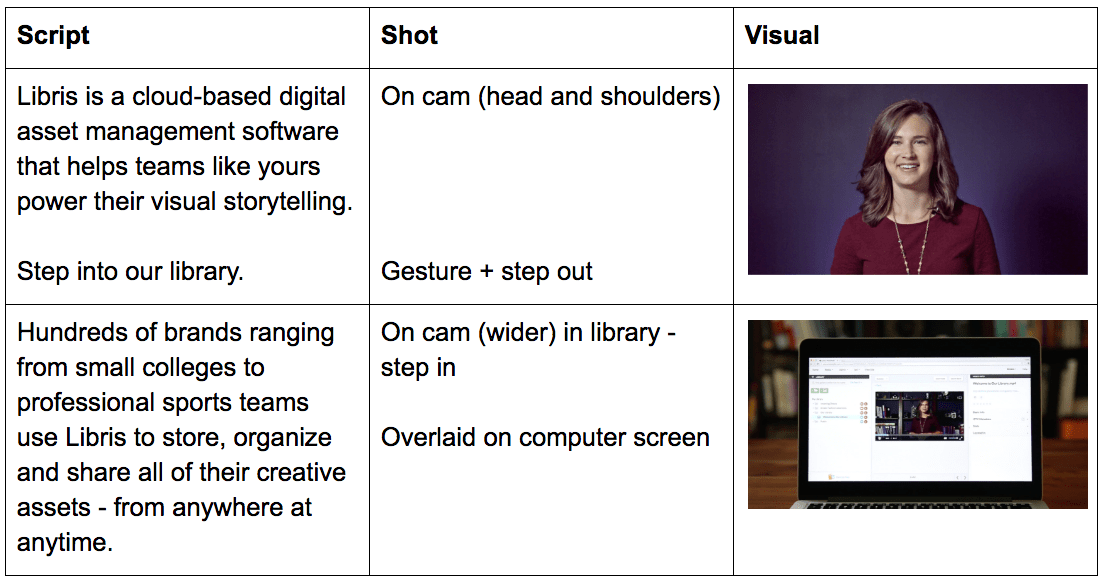
Script and Storyboard
Once you’ve done your research, you should have a list of points you want to hit, successful tactics to repeat and past mistakes to avoid.
Now, it’s time to write your script and build your storyboard.
The key to writing a script that will be easy to bring to life is to think visually. What will your viewer see as they hear this line?
Here is a snippet of my storyboard:
The more you lay out ahead of time, the less time you’ll spend shooting and editing.
Pro Tip: Review your script and storyboard with your team to make sure they are finalized before you start shooting. This will save you time and ensure you don’t have to reshoot anything.
Timing: The script and storyboard took me about two to three hours to write. However, keep in mind that I was not starting from scratch – I was adapting an old script. Give yourself plenty of time to write, and start with lots of ideas. Once you have a script, spend a few days letting it sit and reviewing it with other people – you never know when a good idea will pop into your head!
Production: How to shoot your video
You have lots of options when it comes to shooting your video – you can work with an agency or a production company, hire freelancers, or use in-house talent.
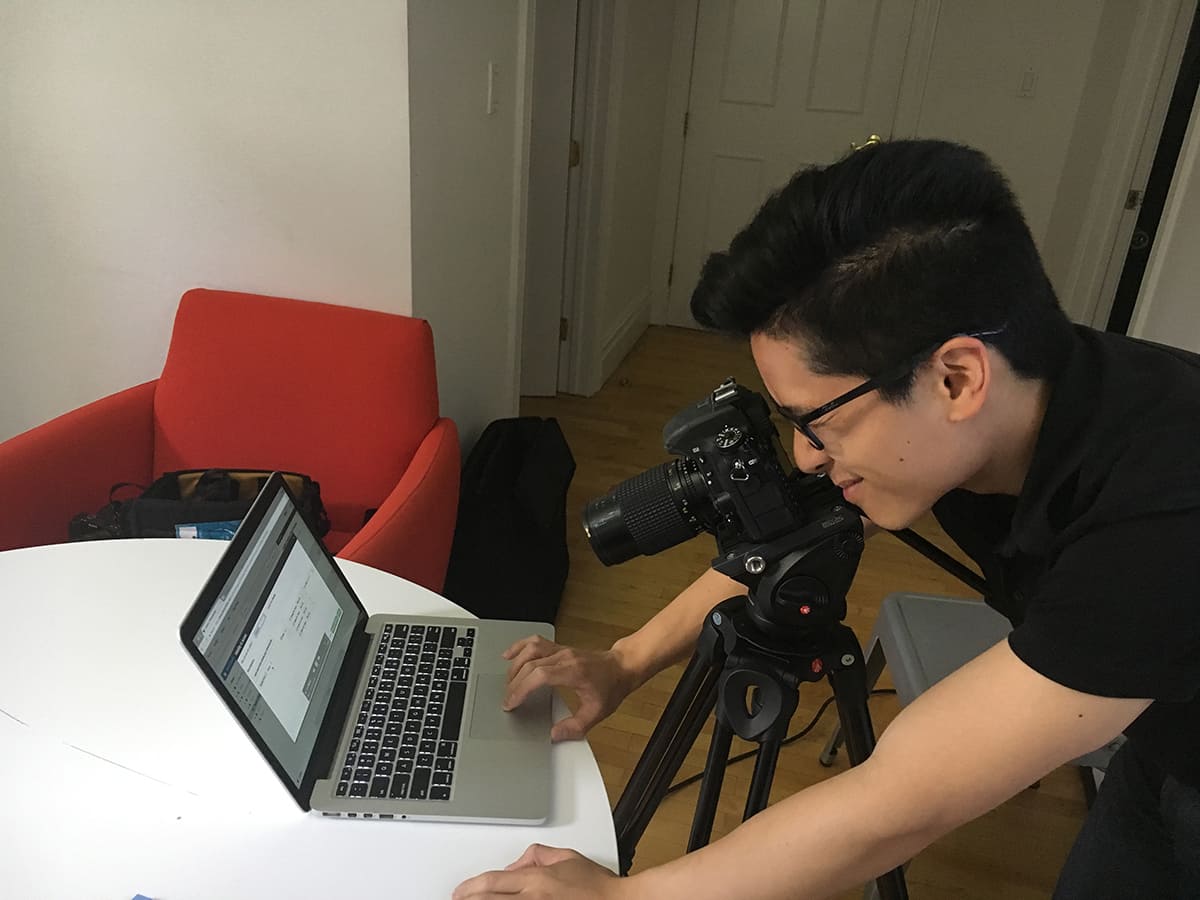
I regularly produce videos for the Libris blog (check out our Behind the Scenes series!), but for this project, I needed some extra help. I recruited our design team – Todd, our Art Director who’s also a professional photographer, and Niamh, our Junior Graphic Designer, to help me with lighting and shooting.
Equipment
As photographer Chase Jarvis said, “the best camera is the one that’s with you.”
Don’t let equipment, or lack thereof, stand in the way of a great homepage video (these days, you can produce great video with your iPhone). At the same time, for your homepage video, you want to put your best foot forward. That means you should use the best equipment you have access to, and take your time to make sure it’s well shot and professional.
Here are some easy tips to up the quality of your video:
- Mount your camera on a tripod – no shaky handheld shots for this important piece of content
- Light it – whether you’re using natural light or professional lighting, make sure your lighting is consistent and your subject is well-lit
- Use professional sound equipment – don’t use your camera’s built-in microphone to record sound, invest in a lavalier mic or a shotgun mic, instead
Here at PhotoShelter, we’re fortunate to have access to professional equipment since we produce a lot of video content. Here’s a list of the equipment we used to shoot our homepage video:
- Camera: Sony a6300 with a Sony 18-105mm f/4 lens
- Microphone: Rode NTG2 Condenser Shotgun mounted on a boom
- Tripod: Manfrotto fluid video head tripod
- Lighting: Two Limelite Mosaic LED panels
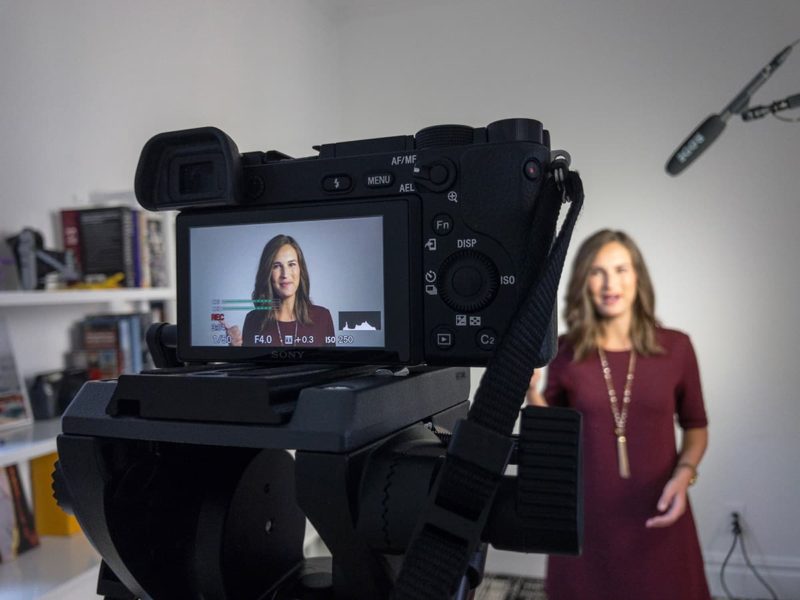
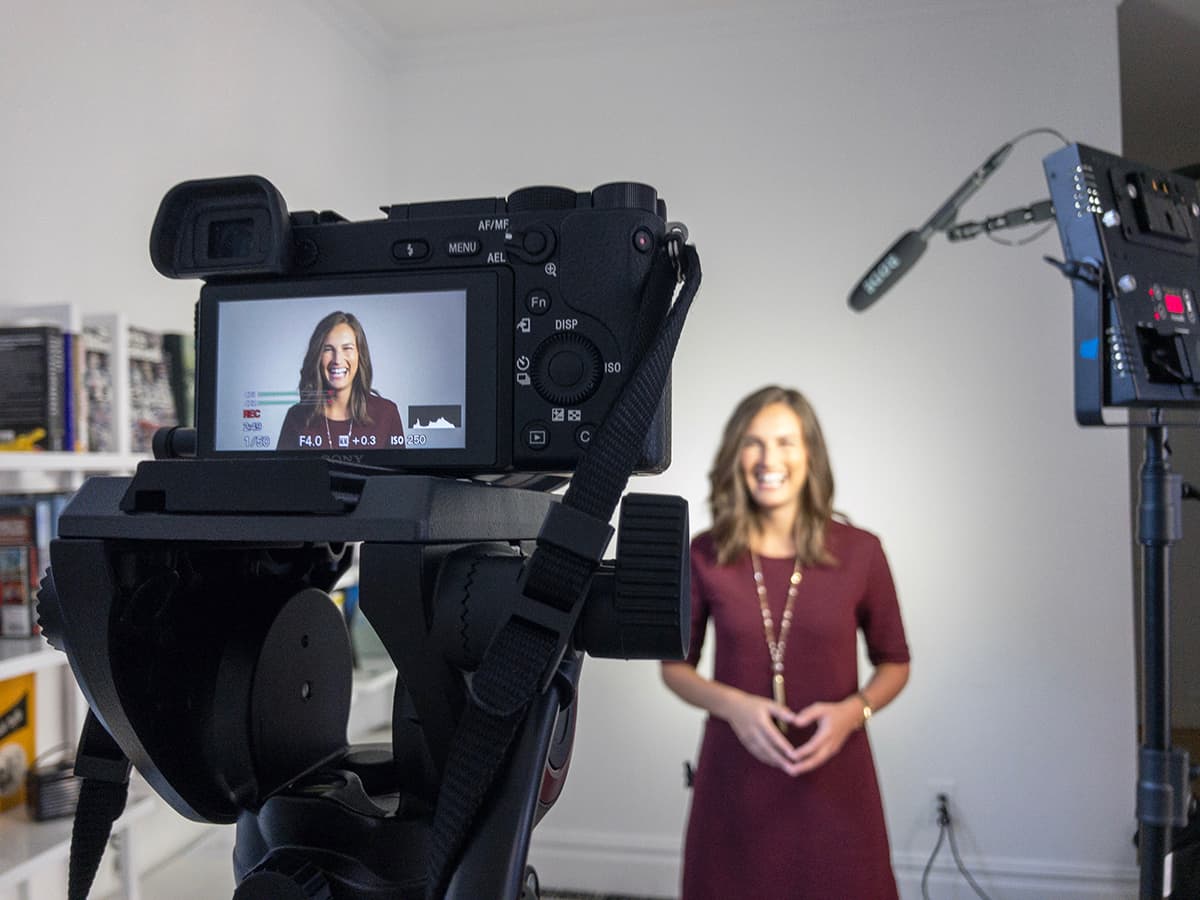
Here’s a look at our setup. The second light is positioned low, directly behind me, to light the background.
Shoot
Go into your shoot with a shot list so you don’t waste time wondering what to shoot next. Check off each shot as you go along. But remember, have fun and roll with the punches.
The most important skill for a video producer is problem solving. If you go into your shoot with a finalized script and shot list, things should go smoothly, right? But you never know what issues will pop up in practice that you didn’t expect on paper.
For example, we had originally planned to use natural light for our shoot, but when we got to our shooting location (a conference room in our office), we realized we didn’t have as much light to work with as we expected. We decided to use two LED panels to bring more light into the composition, which meant we needed to move a lot more equipment each time we changed our shot.
Plus, we all make mistakes. If you are delivering lines on camera, you’ll probably need a few takes to get it right. Case in point…
The good news is I was working with a very patient team with a good sense of humor – I highly recommend you do that, too!
Pro Tip: Give yourself plenty of time to get set up, capture every shot, and nail your script. You don’t want to get back to your desk only to realize you didn’t get the shots you envisioned.
Once we shot all of our on-camera scenes, we needed to record the voiceover and shoot our B roll (B roll is alternative footage you use to tell your story visually, rather than using a talking head throughout your video).
To keep the audio quality consistent, I recorded the voiceover with the same mic and in the same location as all of our on-camera scenes.
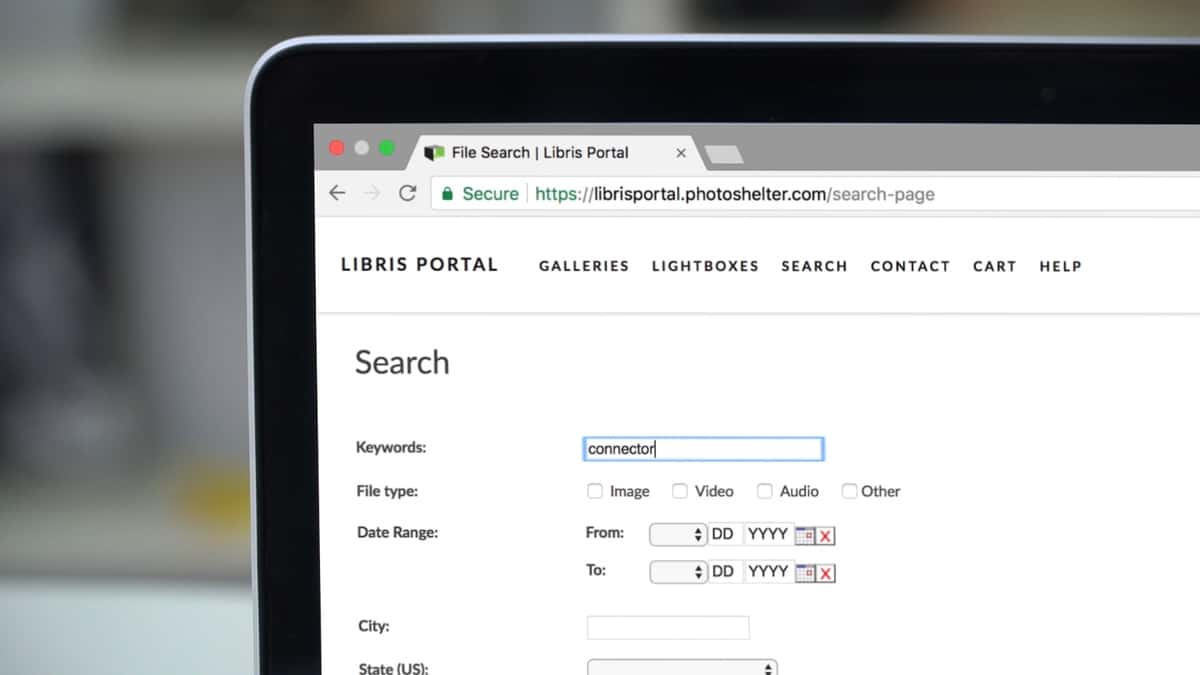
Then, I used Quicktime to make screen recordings to go with each line of the script. For this video, we used screen recordings of our product as B roll, but depending on your product and your script, this could be live action footage or animations. If you’re a bike retailer, your B roll might be footage of people riding your bikes, shots of your store locations, etc.
Pro Tip: If you’re making screen recordings of a software product, record your voiceover and lay it out on a timeline. Listen to the track as you record your screen so your B roll and voiceover time out perfectly.
Finally, we set up a second shoot and recorded video of the screen recordings playing on the screen. We also shot tight cutaways, which allow you to show something up close, change up your shots, and cut between similar angles.
Here’s an example of one of our cutaways:
And here’s a look at our setup:
Pro Tip: Make sure you get enough cutaways. Going the extra mile during your shoot will make your editing process much easier.
Timing: Our first live action shoot (where we shot all the scenes of me on camera) lasted four hours, and our second shoot (where we shot the computer) took about two hours. The screen recordings took about two to three hours, with several revisions amounting to about two hours. Depending how much practice you have with screen recordings, this process can take more or less time.
Post-Production: How to edit your video
Now that you have all of your footage, it’s time to start putting it together. For me, this last stage includes logging, editing and review.
Log
As soon as we finished shooting, I logged all of my video. I went back through the footage and wrote down the time codes of the best takes (and the best bloopers, of course).
Pro Tip: If you’re logging your best clips in a document, rank them or use words to distinguish the good shots from the best shots. When I saw a good take, I marked it with “good take,” but when I saw a take that was exceptional, I marked it with “best.” Once I finished logging, I hit ctrl+F to find all the best takes and quickly decide what would make the final cut.
Timing: This stage depends entirely on how much footage you have. For this project, it took me about two hours to log every clip and mark the best takes.
Edit
Next, I started laying the best clips out on a timeline. I use Adobe Premiere Pro to edit video, a natural fit since I use the Adobe Creative Cloud. As with your camera equipment, your editing software depends on your resources and your personal preference.
Once I had a skeleton of a video – my on-camera intro and outro, with the voiceover in between – I started layering the B roll on top of that.
Now, remember what I said about problem solving in the last section?
As I was going through the footage we shot of the computer, I realized the computer screen was not clear enough. And remember, if a video is going to be the first thing people see on your homepage, you want to make sure it’s the highest possible quality. So, we decided to use Adobe After Effects to overlay the screen recordings on the shot of the computer.
Check out the difference before:
And after:
The final product is sharp and clean. Silver lining: shooting the cutaways on the computer screen helped me make more accurate representations in After Effects, because I used the live action shots as guides.
Timing: My entire editing and review process was spread out across four days. I would estimate that it took between 10 and 15 hours to edit, review and tweak the video.
Music
I recommend choosing your music as early in the editing process as possible. This will help you with your pacing.
When we set out to create our new video, we knew we wanted to change the music to something less cheery. When I asked Sandwich Video Founder Adam Lisagor for help, he told me what to avoid: ukulele, hand claps, whistles and glockenspiel. Solid advice and a tall order, since many stock sites offer a lot of exactly that.
Try hunting for music that sounds fits your brand, your video and your personality on sites like Premium Beat and Marmoset.
Review
Once you have a first draft, it’s time to show it to other members of your team. See what sticks out to them.
Here are some questions to ask after they’ve finished watching the video:
- Did you feel like anything moved too quickly?
- Could you hear everything?
- Did all of the visuals make sense to you?
- What’s missing?
- What would you change?
Start tweaking the video based on their feedback. Then, repeat as necessary.
This process was key for me as I edited our homepage video. It led me to adjust the audio in certain sections, change a shot from one angle to another, and simplify some transitions.
Publish: Time to test your video in the wild
Once you’ve gotten buy in from your team, it’s time to go live. Upload your video to your publishing platform of choice and embed it on your homepage.
Drumroll please… Here is our final video!
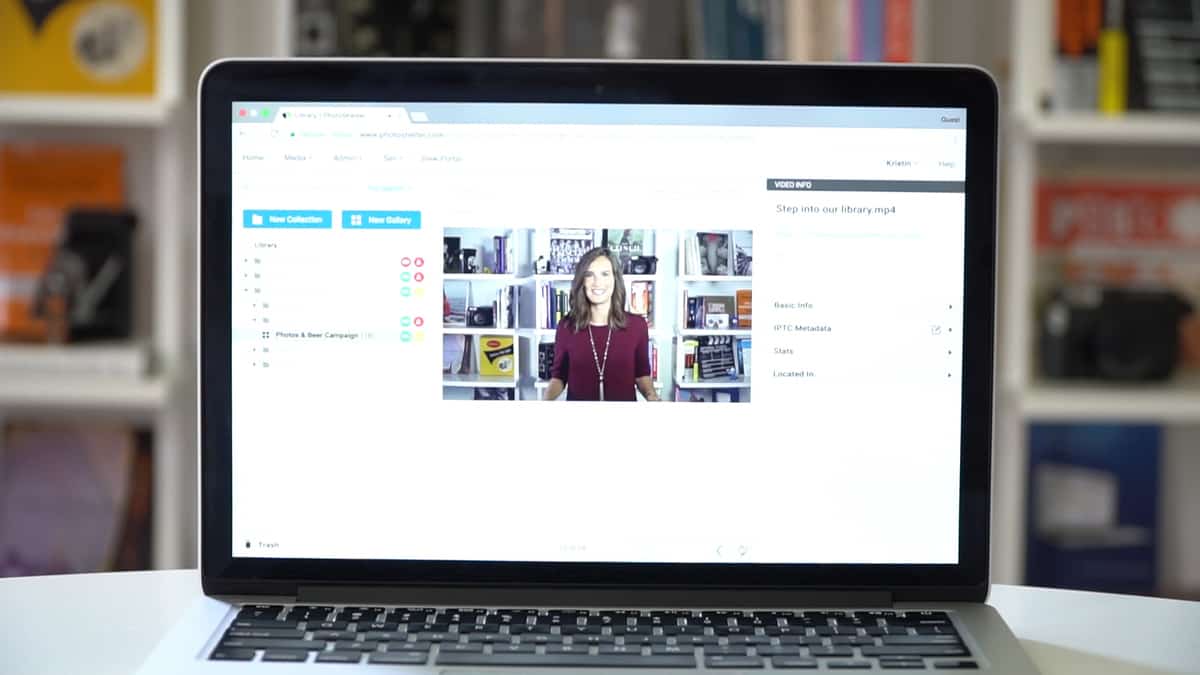
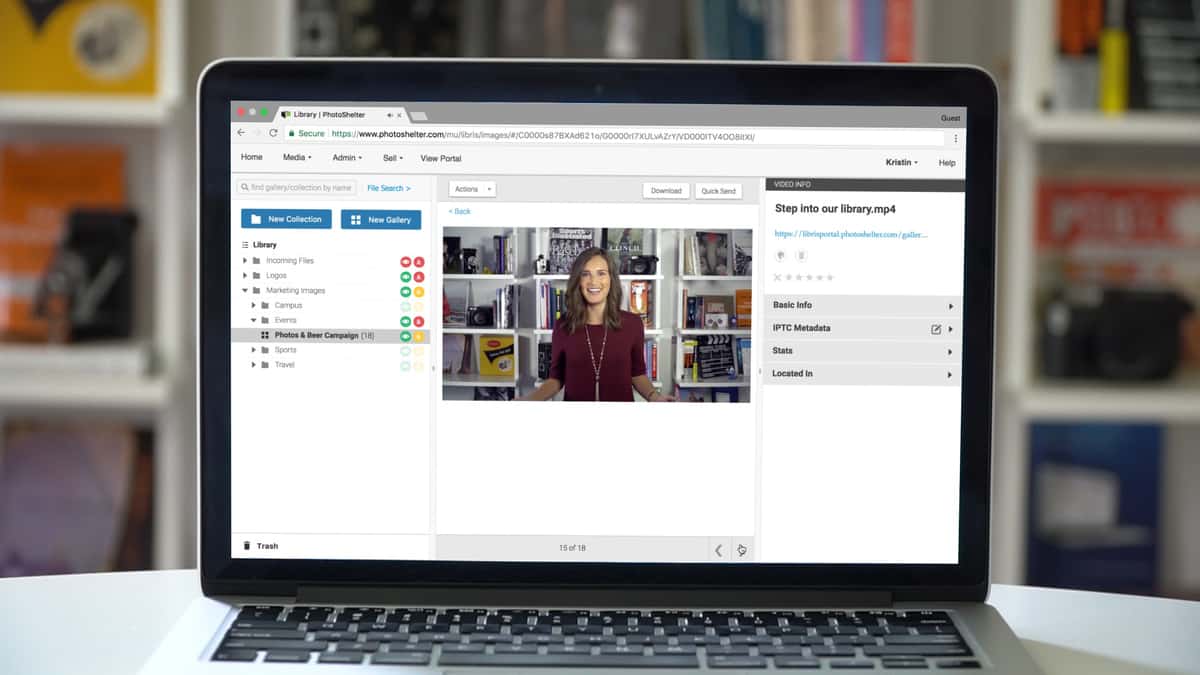
We embed this video on our homepage using Wistia, because it allows us to add a call to action at the end of the video. We also publish it on YouTube for SEO.
Now that our video is live on our site, I will keep track of how many people are watching it, how many people are engaged (watching the full video), and how many are clicking the call to action. Tracking these stats can help you measure the impact of your video and inform any changes you still need to make.
Pro Tip: If you can, A/B test your new video against your old homepage video, or against your homepage without a video. This will help you prove return on investment.
Lights, Camera, Action!
Still have more questions about how to make a video for your homepage, or about how we made ours? Tweet them at us @psforbrands.
Good luck making your video, and let us know how it goes. We can’t wait to see the final product!
Still need a little inspiration? Scroll through some of our favorite explainer videos below!
Dollar Shave Club
This is perhaps – dare I say it – the most infamous explainer video of all time. It went viral and put Dollar Shave Club in the Spotlight.
Zendesk
Zendesk uses animated video and a natural voiceover to present a problem and explain how their software can help businesses solve it.
1Password
Sandwich Video’s “No More Sticky Notes” video uses a relatable example to explain 1Password, along with motion graphics that will keep you entranced until the end.
Franklin & Marshall College
Franklin & Marshall College puts its alumni spotlight series front and center on the school’s homepage, so prospective students and other community members can see the value of a Franklin & Marshall education through the eyes of a grad.
Special Olympics
As Special Olympics celebrates its 50th anniversary, the nonprofit has created a homepage video with great throwback B roll and images that show the donors’ impact.
Good luck making your video!
Cover photo by Todd Owyoung.