Here on the Libris blog, we are always sharing stats about visual communication, tips for organizations using photos and videos to tell their stories, and great examples of organizations that are doing it right.
Now, we are taking you behind-the-scenes of our own visual content production!
79% of marketers say the importance of video will increase in the future, and PhotoShelter’s Director of Marketing, Amy Fitzgibbons, is no exception.
“Video gives us an opportunity to tell a larger story about what we can offer to potential customers, and it lets us showcase our value prop and overall brand in a more in-depth way as well,” said Amy. “Both are important as part of our holistic marketing strategy as more competitors enter the marketplace, and we need to find new ways to grab the attention of our audience. Also, because PhotoShelter offers a whole suite of features (over 100!), video lets us dive into aspects of our product that aren’t necessarily communicated well with words or still images. Posting them across social media means that they are more likely to be seen and shared — and, because video is something other companies in our industry have yet to really leverage with regularity, our videos stand out amongst the other advertising out there.”
For any organization, expressing your brand’s story visually is challenging, but increasingly vital. Your fans are demanding more and more visual content, and it’s easy to get overwhelmed by the process. So many businesses use things like Yard Signs, Banners from companies like Super Cheap Signs to help create awareness of their brand. However, now times are changing and businesses are looking at creating visual content to help them with this.
That’s why we’re lifting the curtain on our own experience and sharing it with you, step by step. As you read about our brainstorm, production, and delivery process, we hope you’ll get ideas for your own video content.
First, I’ll show you the finished product: a video ad about an easier photographer workflow produced for social media. Then, we’ll go into the details of how this :30 second spot came together.
Now, let’s go behind-the-scenes!
The Idea
It all started when Joy, PhotoShelter’s Senior Marketing Manager responsible for acquisition marketing, decided it was time to add video to PhotoShelter’s social media strategy.
“We are always looking for new ways to reach and engage with our target market of photographers,” said Joy. “For photographers, marketing themselves is critical to growing their business and we know that social media is a critical channel to drive promotion. With many photographers regularly using social media to both interact with their clients and get inspiration from each other, we knew it was a great place for us to reach them and drive awareness of the PhotoShelter brand. Within these channels, we wanted to leverage video to bring the PhotoShelter platform and tools to life.”
Let’s break down the reasons why adding video to our social media strategy was a fit for the PhotoShelter brand:
- Visual content is key (especially for a brand that serves people communicating visually!).
- Video’s importance is on the rise.
- Great brand videos have unmatched potential to capture your audience’s attention.
- Video is shareable. 92% of people who watch videos on mobile devices share them with others.
- PhotoShelter’s core audience is using social media for communication and inspiration.
The Takeaway: Video offers organizations a huge return on investment. Organizations that leverage the power of video on social media have the potential to build brand loyalty and reach a new audience.
The Brainstorm
Once Joy had decided to create a video for social media, she assembled a team of people from the office (the faces behind our marketing, design and content) for a brainstorming meeting.

The goal was to show how PhotoShelter gives photographers an easier workflow from upload to sales. But how do you communicate that visually? And in 30 seconds, no less?
Here are some questions we asked ourselves during the brainstorm:
- What are the key points we have to hit in these 30 seconds?
- What is a relatable, compelling story we could use to demonstrate those points?
- What are the visuals? What do we want the audience to see, and what will be eye-catching as they scroll through their social media feeds?
- What should the feel of the video be, and how do we keep our visuals and storyline consistent with the overall vibe?
- How should we use audio – should we use dialogue or just music?
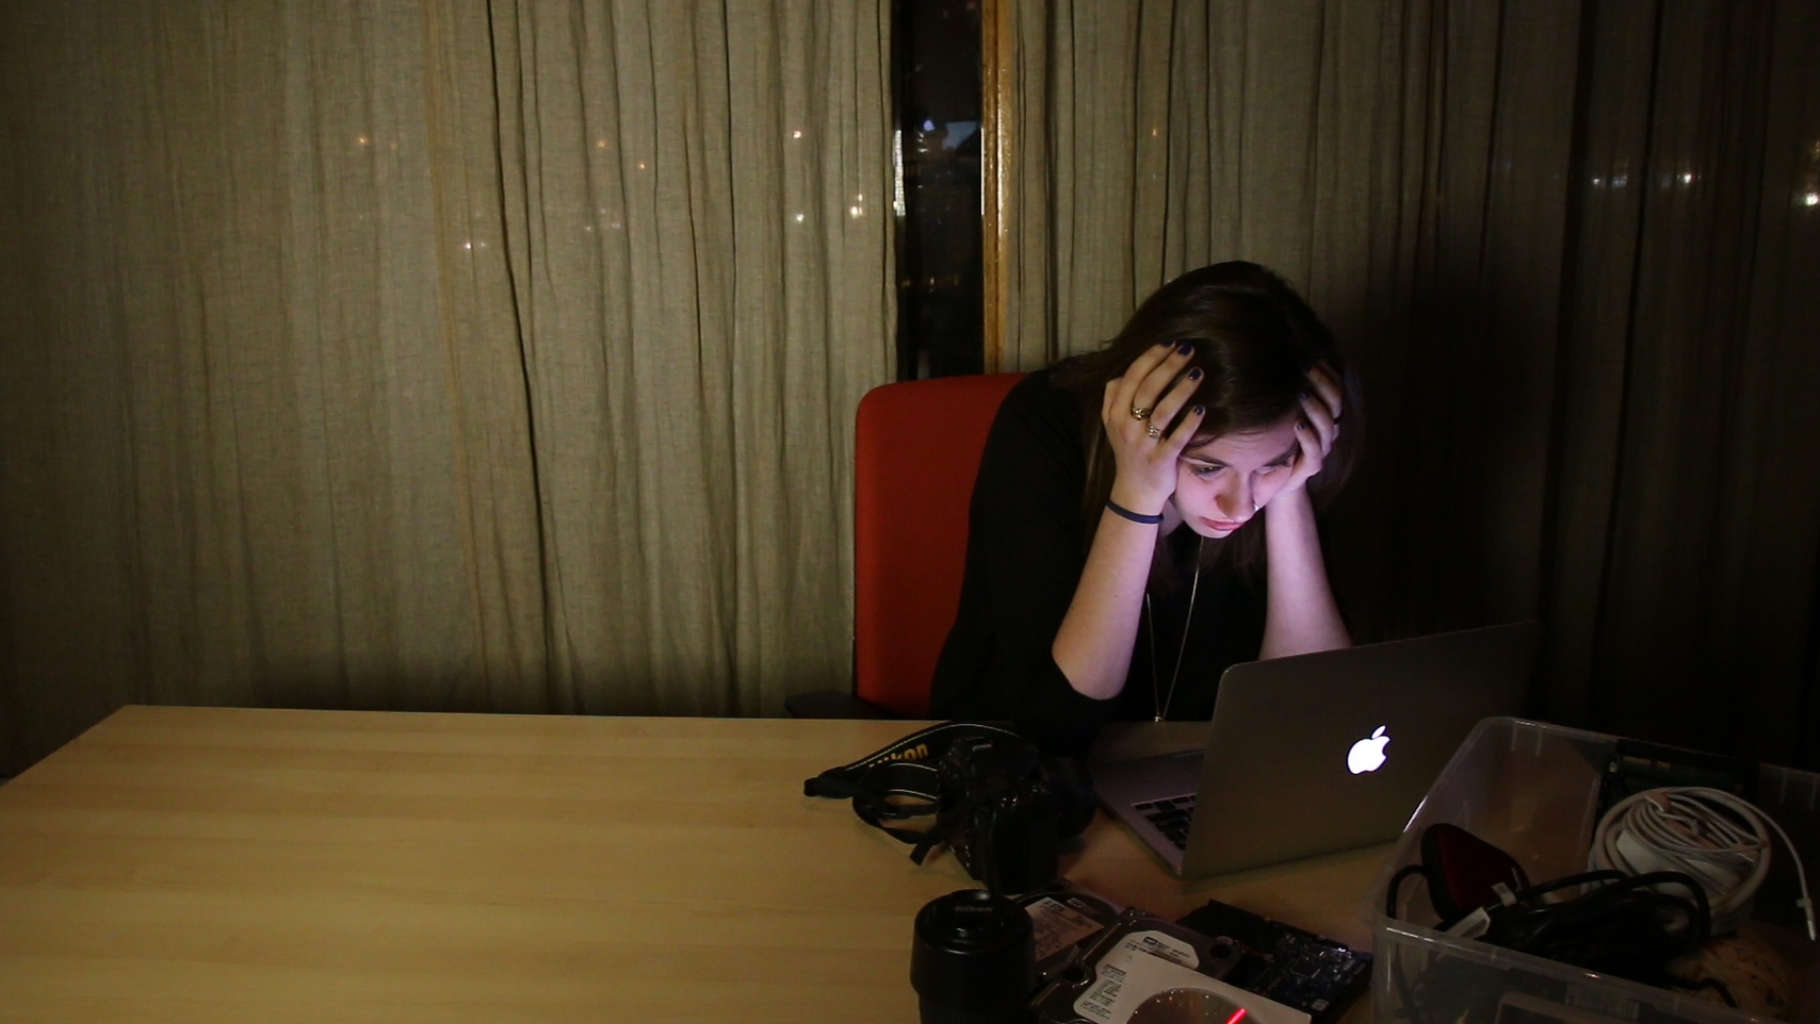
We were inspired by a story Joy shared about a photographer she interviewed who keeps his photos on dozens of hard drives in his closet, along with all of his other clutter. This story resonates with a lot of photographers (and anyone who’s ever had a mess they didn’t want to deal with). Photographers are busy, and many of them don’t have an efficient workflow after a shoot is over. They save their photos to hard drives, and then over time, they end up with dozens of hard drives that aren’t organized either.
The problem here isn’t just the mess – if a client calls you to get images from a shoot you did a few years ago, you have to dig through your hard drives to find the shot, which can take hours. Plus, what if you’re on the road and not close to your hard drives?
This story helped us hone in on the main point of our video: PhotoShelter makes client delivery easy and stress-free.
We brainstormed a number of ideas until we landed on our final concept: two photographers, one with a mountain of hard drives and the other with PhotoShelter, both get an image request from a client and have to send the photo as fast as possible. To save time, and to highlight the contrast between the two workflows, we decided to use a split screen and show both stories at once. Then, to go with the overall theme of an easy workflow, we decided we wanted the visuals to be bright and airy, and the music to be upbeat and easy-breezy (we decided not to use dialogue, because video ads on social media autoplay without sound).
The Takeaway: At the beginning of your brainstorm, throw out every idea you might have and keep a list (you never know when those scrapped ideas might come in handy). By the end of the meeting, make sure you’ve narrowed your focus to a compelling story. And, make sure everyone walks away from the meeting knowing the role they will play in the production process.
Now, to the drawing board!
The Storyboard & Shot List
Next, Deborah, who manages content for the PhotoShelter platform, put together a storyboard for the video. This document became our compass for the rest of the project. It gave us direction for the action and informed our production needs, from setting to props. Plus, it helped us define exactly how we would demonstrate our big idea.
“It was important that we highlighted how easy it is to search your PhotoShelter archive, locate an image, and deliver it using a feature like Quick Send,” said Deborah. “The comparison between a photographer who uses PhotoShelter and one who doesn’t was also a crucial part of the story. It helped drive home the point that having an efficient business workflow not only saves a photographer time (and stress!), but can also leave a great impression with clients.”
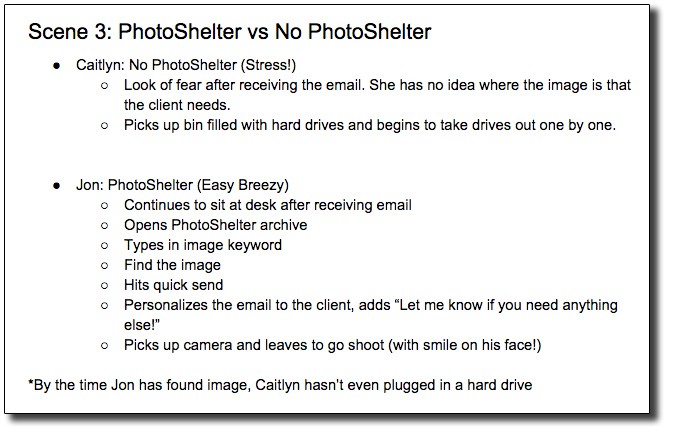
Take a look at this snippet from the storyboard:
Then, it was my turn to create a detailed shot list based on our overall vision (I produce content for Libris, and worked on this project with the PhotoShelter team because of my background in video production). A shot list helps you make sure that when the time comes to shoot your project, you are moving along efficiently and you capture everything you need.
For this project, we had a limited window of time before the light changed and the rest of our team started coming into the office. The shot list was key to making sure we got everything we needed.
The shot list included everything from a wide shot of our hard drive photographer unloading her hard drives…
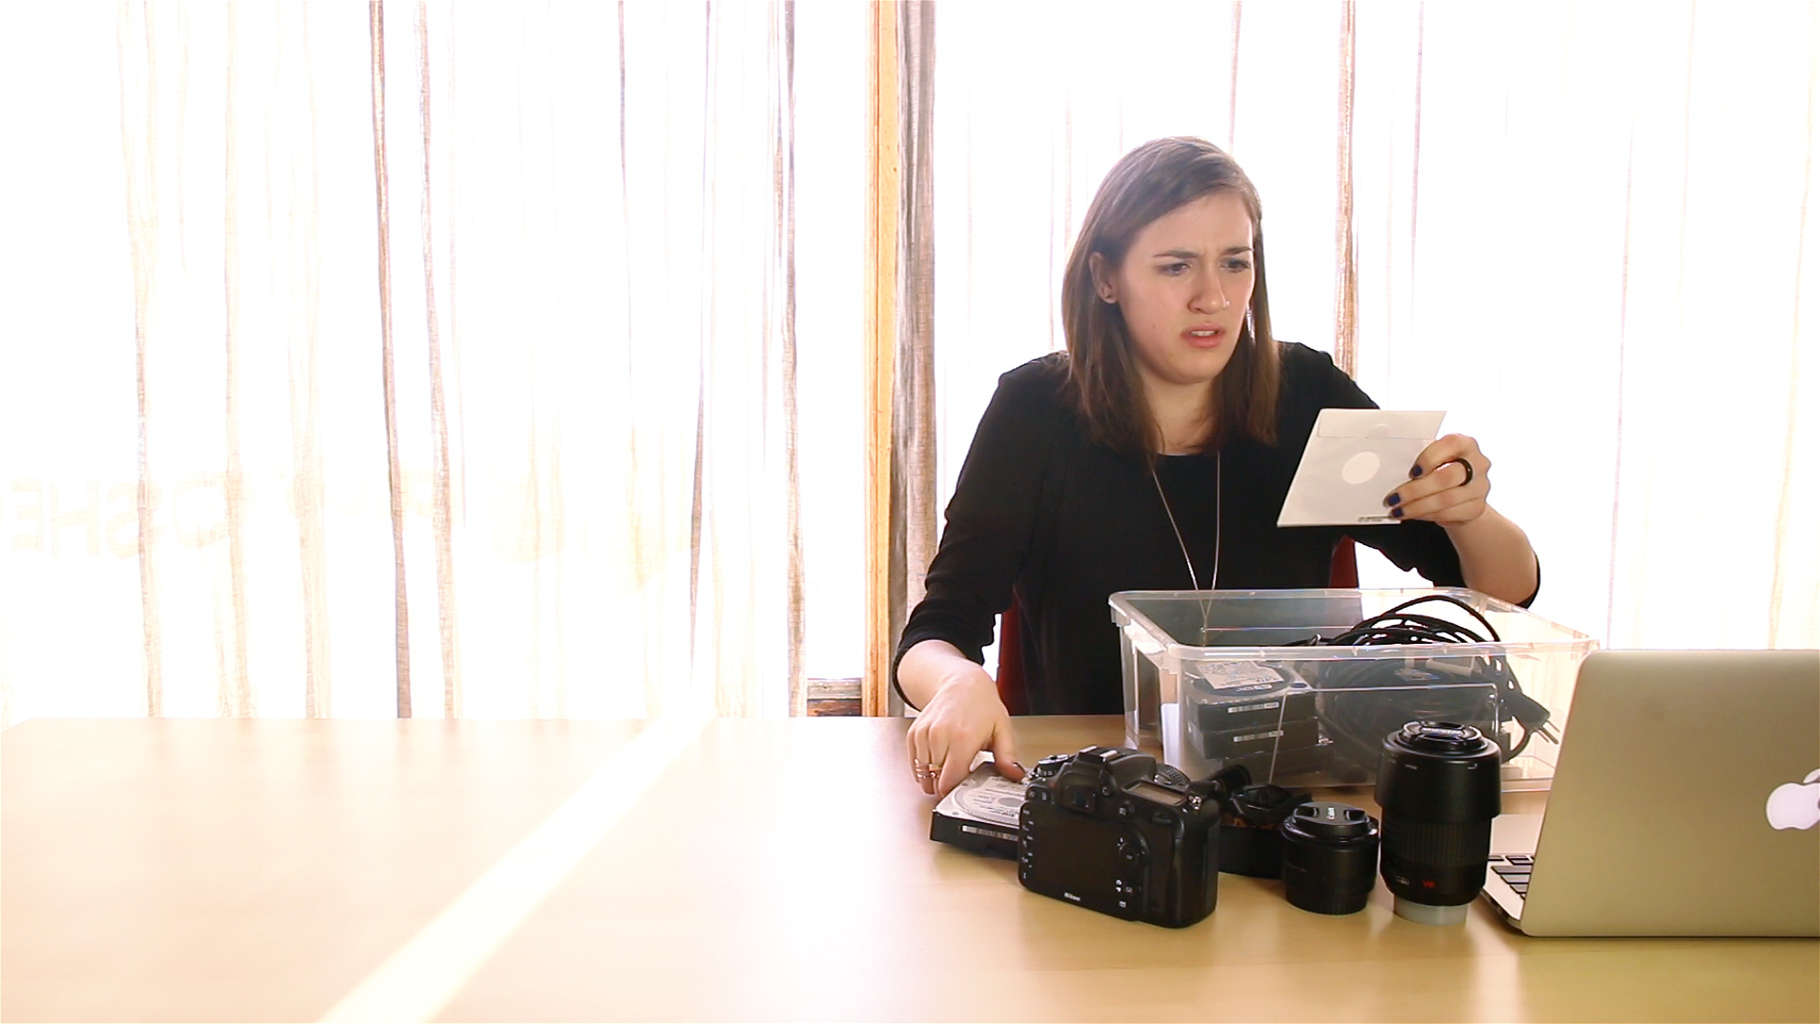
… to a tight shot of our PhotoShelter photographer’s confirmation that his photo was sent to the client.
The Takeaway: Have a clear vision of your final product before you start shooting. Not only does this keep your whole team on the same page, but it also ensures your final edit will be consistent with your original goals for the project.
Once we had our vision laid out on paper, it was time to bring it to life.
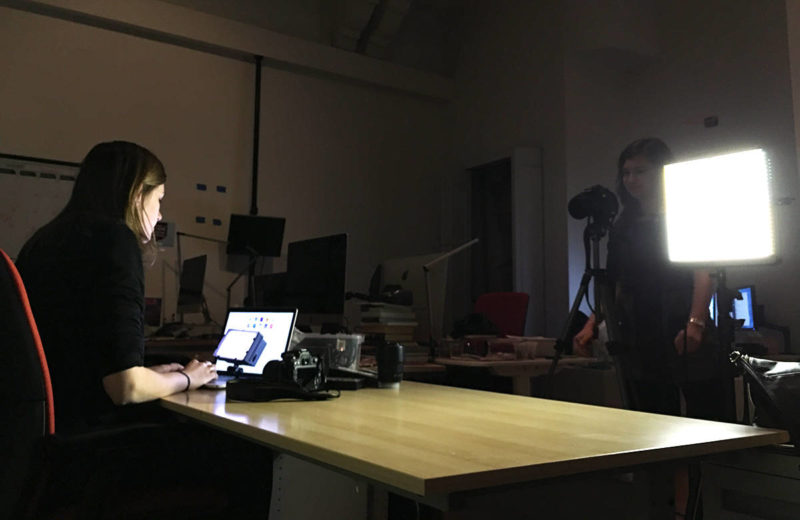
The Shoot
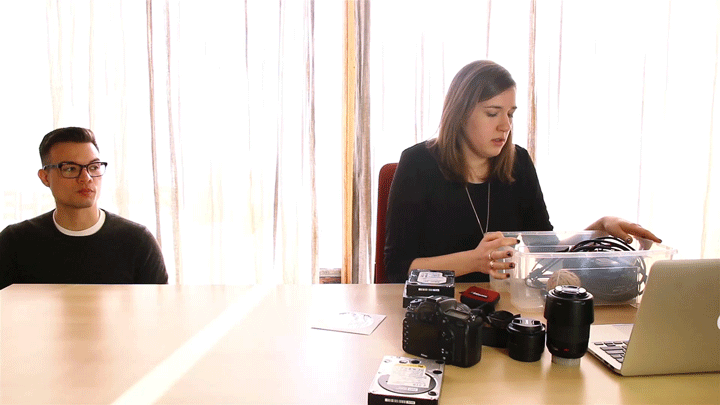
By the time we gathered for the shoot bright and early on a Friday morning, everyone knew their roles – including our two “actors,” Jon and Caitlyn, who are both customer service representatives here at PhotoShelter.
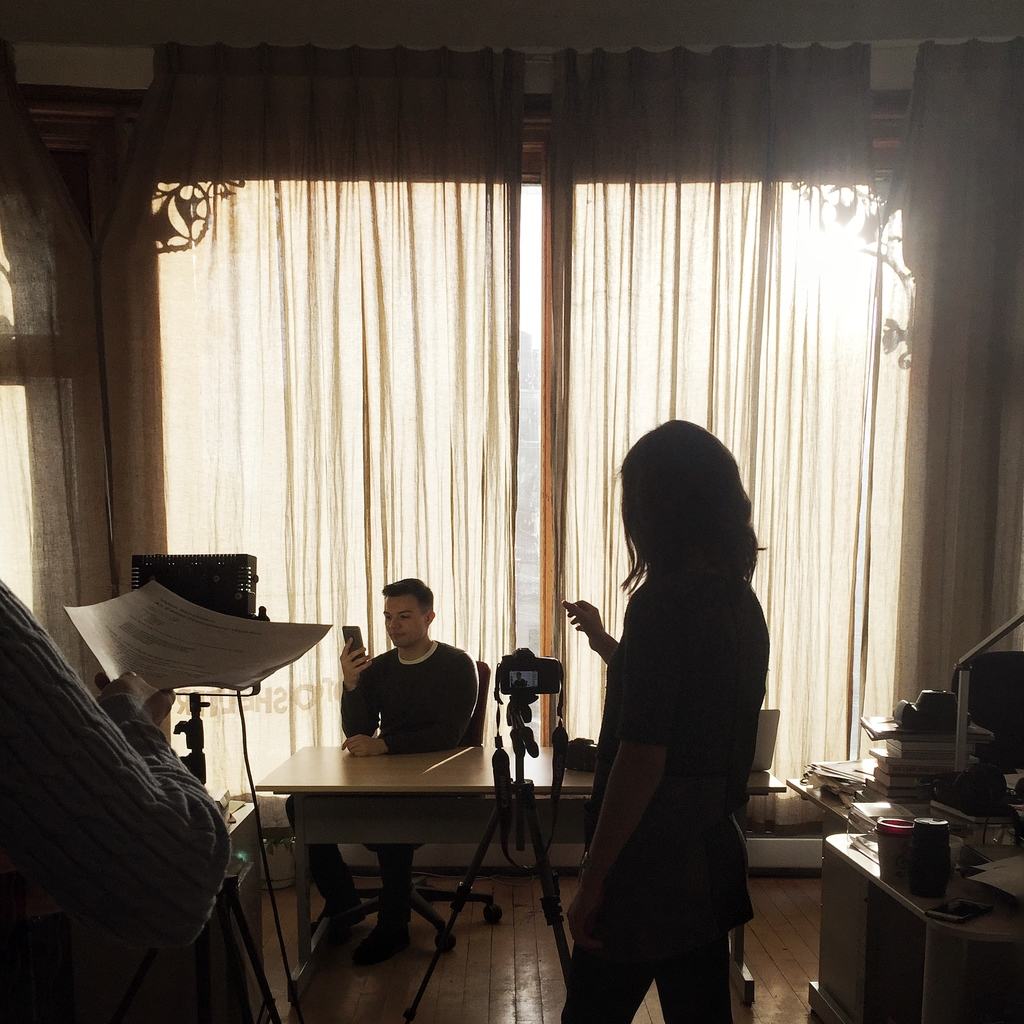
Our biggest hurdle during the shoot was capturing Caitlyn’s wide shots. As our hard drive photographer, her challenge was to react to the client request, pick up her bin of hard drives, sort through them (while making hilarious facial expressions), and eventually look up at Jon in confusion, as if she was thinking, “how did you do that?” The timing had to be just right – her one long shot had to match up with Jon’s sequence of many tighter shots, showing how he could use PhotoShelter’s Quicksend feature to send the photo in seconds.
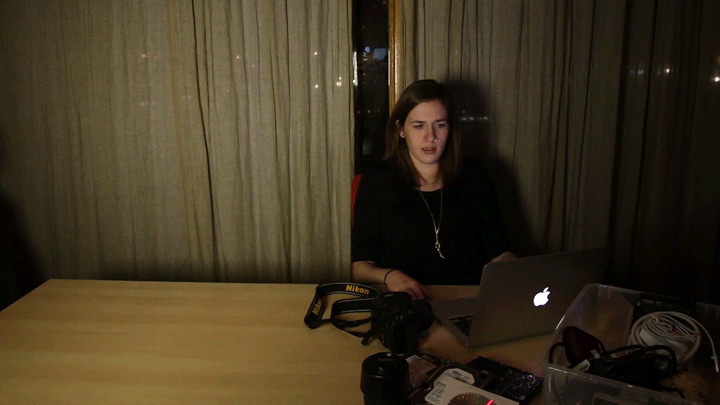
To make the timing work, we had our designer Erin set a timer for 16 seconds, give Caitlyn a signal to look over at Jon. This is what it really looked like when Caitlyn watched Jon send off his photo and walk away:
Since we shot each person’s scenes separately, we weren’t sure if the joke at the end would work. Just in case, we shot an alternative ending where Caitlyn dropped her head in disappointment. Check it out:
We also shot a nighttime sequence, where poor Caitlyn finally sends off her photo to the client after a long day of searching through her hard drives. We ran out of time for that bit, and it made the spot feel a little less cohesive.
The Takeaway: Shoot with your edit in mind. Don’t shoot so much b-roll that you’re inefficient, but make sure to get enough cutaways and enough alternate shots to ensure you’ll have everything you need when you’re editing.
The Edit
My first step during the edit was to review all the clips and log each of them. This helps me rank my favorite shots, take note of anything unusable (and the bloopers!), and find everything easily during the editing process.
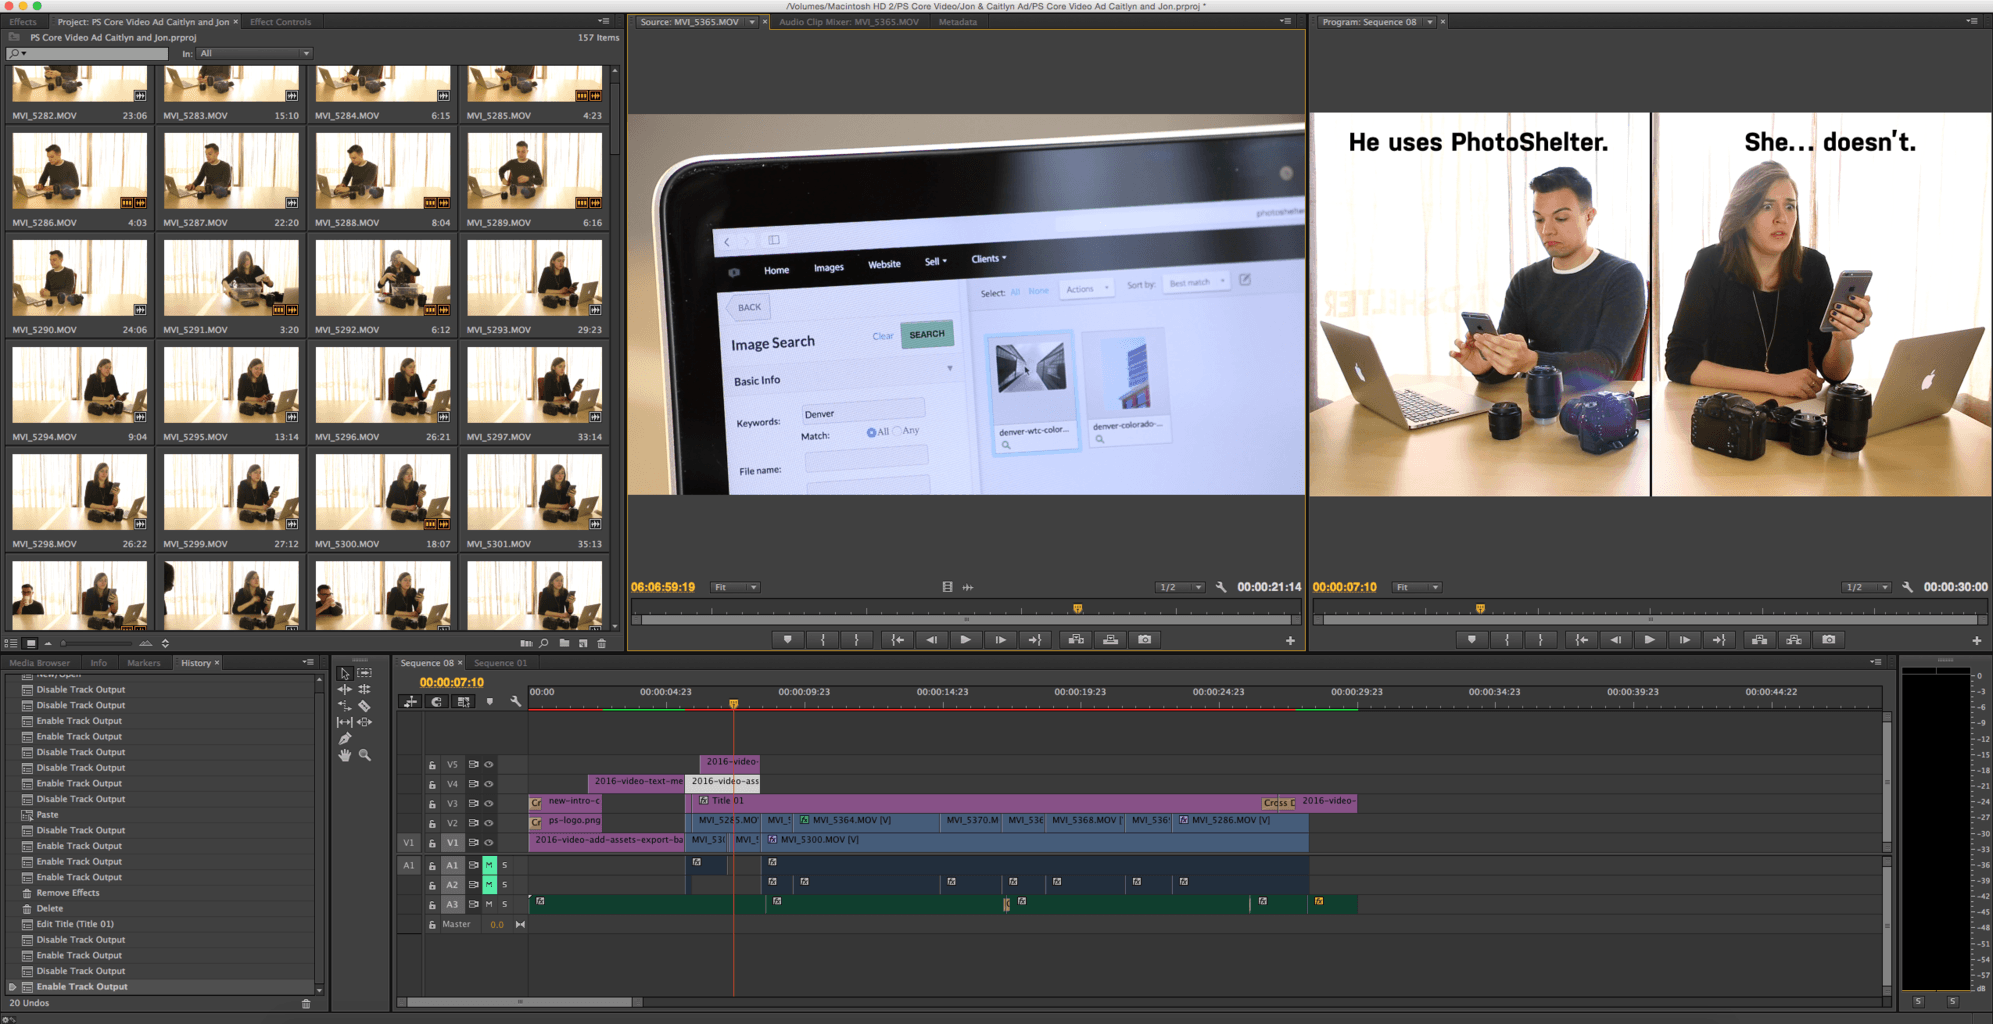
Next, I edited a first draft in Adobe Premiere Pro, exported it, and uploaded it to Libris. I granted everyone on our team permission to view the video, so they could review and weigh in with their thoughts. Remember, at this stage of the process it’s important to have those permissions settings so your video doesn’t get out before it’s ready. Plus, it’s helpful to have a cloud-based platform to share your content with your team (one of our team members was working from home, and was still able to review the draft without slowing down our progress).
During the editing process, we constantly asked ourselves if the story was clear and easy to understand, and if it would make our audience slow their scroll on social media.
“We know how hard it is to grab someone’s attention online, so we needed to make sure that although there were two scenes happening simultaneously, we could still draw the viewer in to major parts of the narrative – especially on the PhotoShelter side,” said Deborah.
The editing process is also where we finessed the details – we changed the opening shot, the text of the image request, and made the decision to freeze the frame when Jon and Caitlyn opened their emails. Each of these details helped us simplify the story and highlight the most important points.
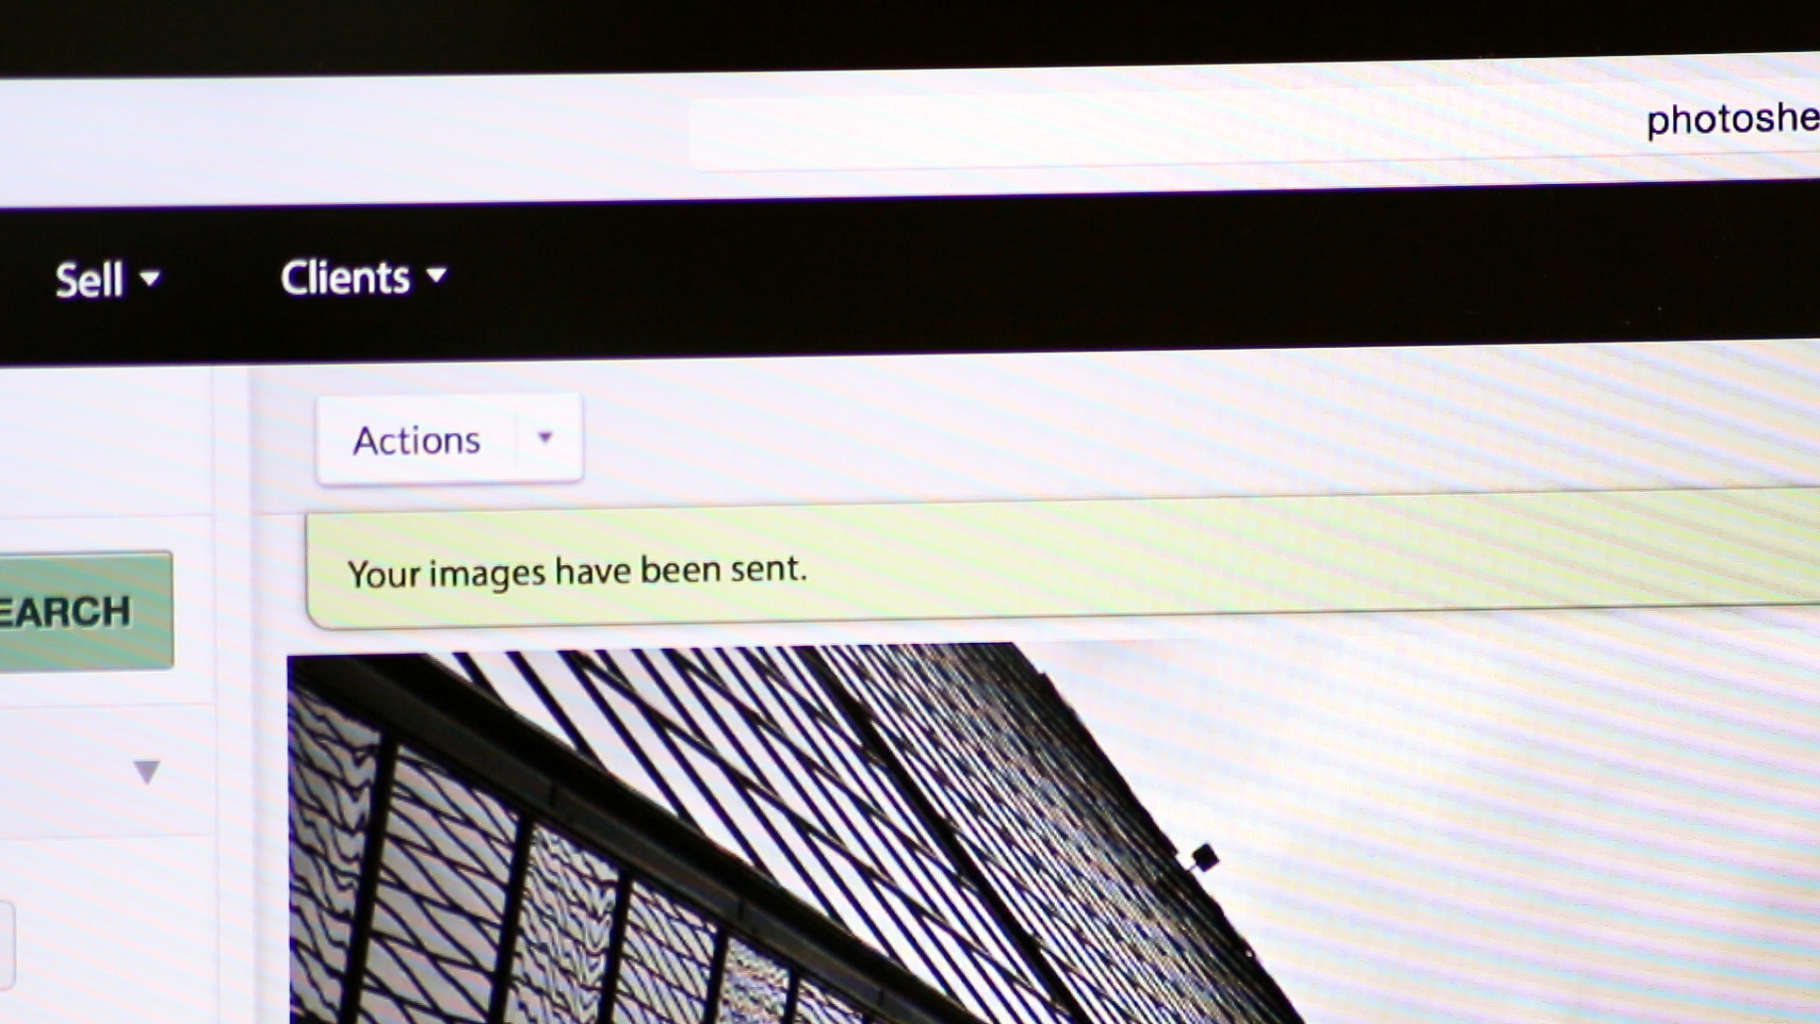
Check out our original email shot…
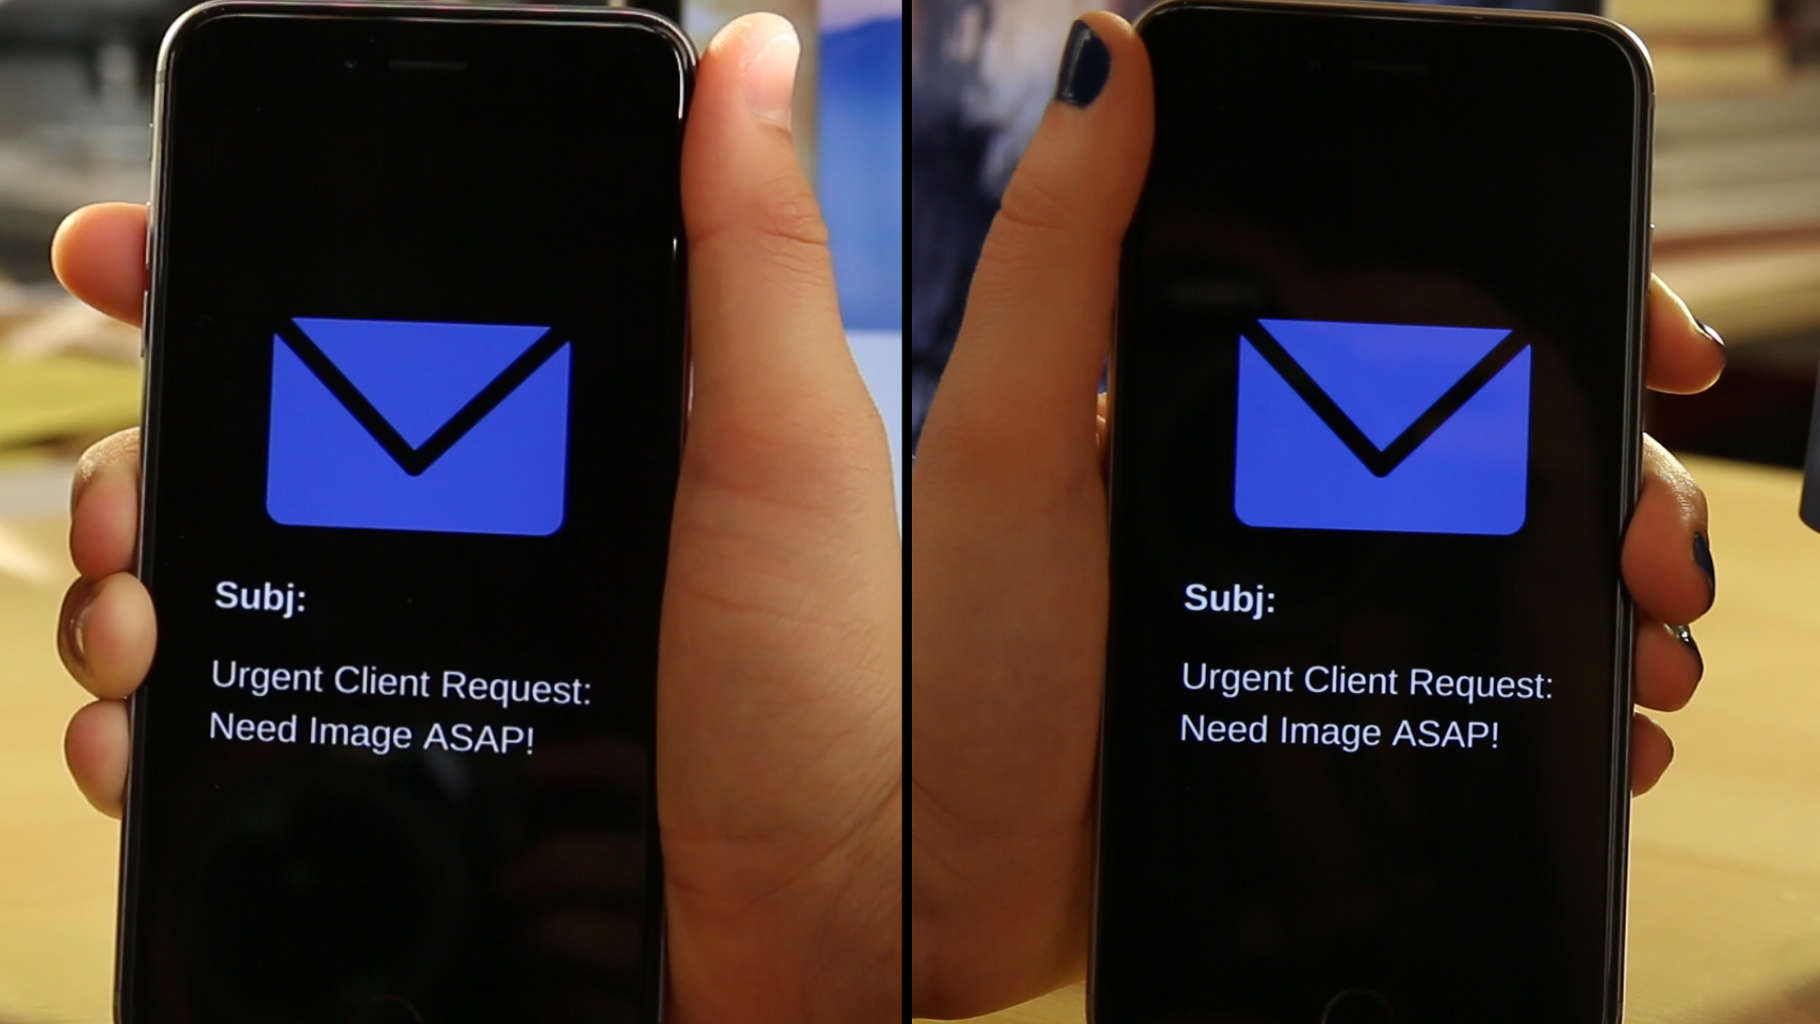
… compared to our final choice:
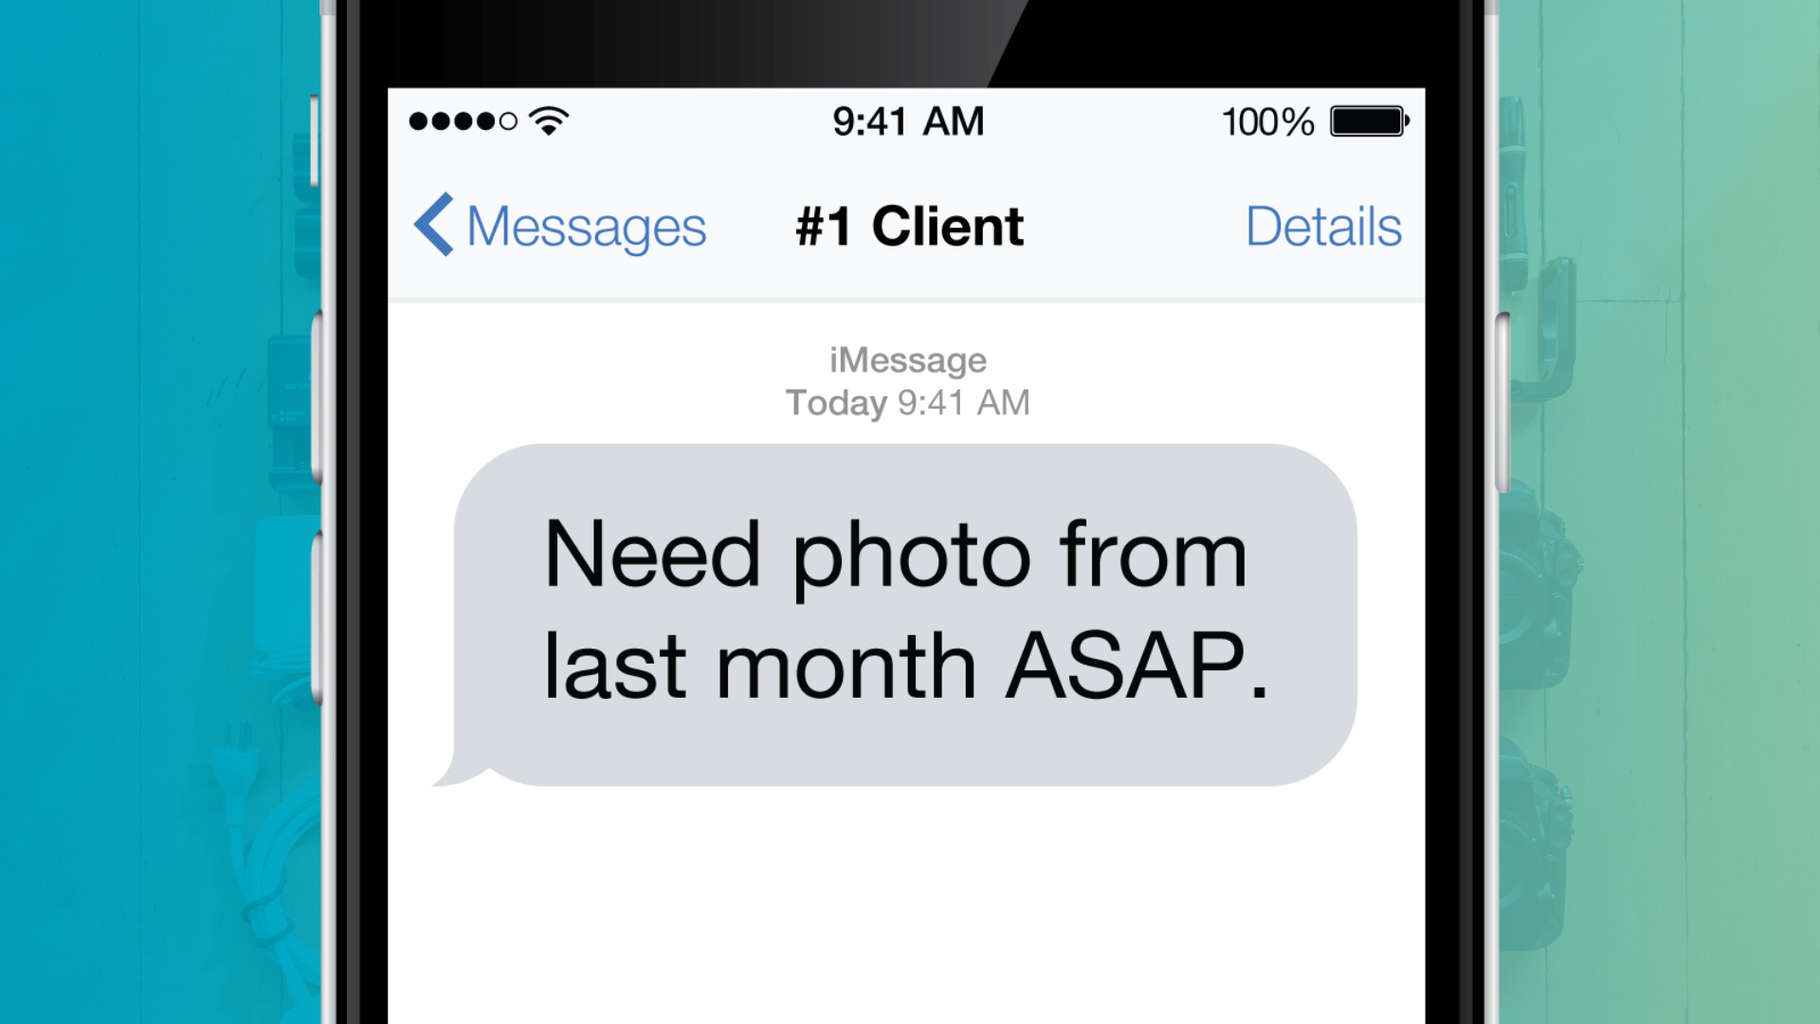
Our final choice (created by our graphic designer, Todd) is easier to read, and it fits with our bright and upbeat visual theme.
The Takeaway: During your editing process, measure everything against your original vision and your goals for the project. Make sure each shot conveys the right message. When you only have :30 seconds to tell your story, every detail counts.
The Delivery
I uploaded the final edit to my Libris account for one last round of review. Once everyone on the team had given the go-ahead, Joy downloaded the high resolution version of the video. Then, she uploaded it to Instagram, Facebook and Twitter, and set up a campaign targeting our audience of photographers in each channel.
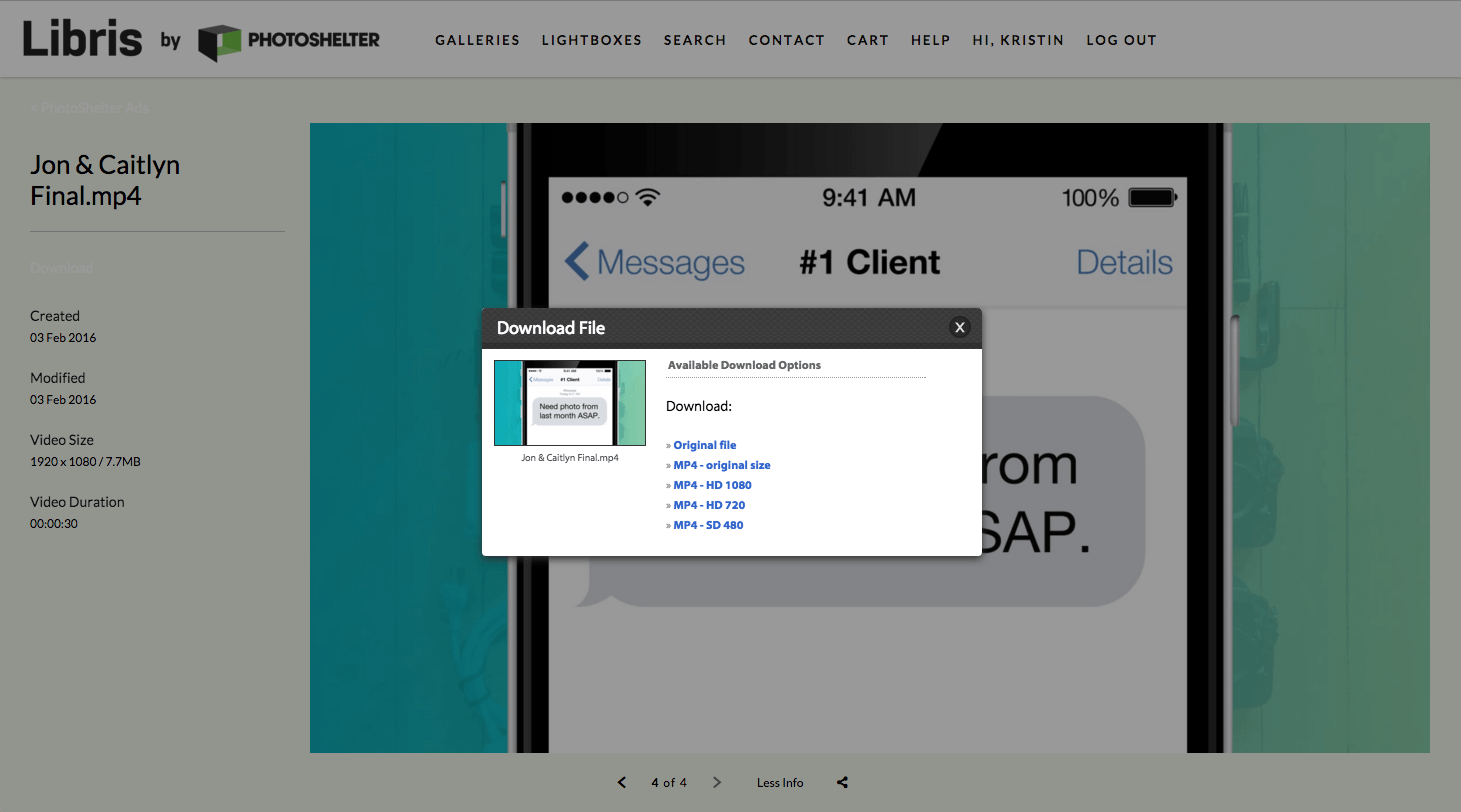
The Takeaway: The transfer of high resolution visual assets is a pain point for many organizations. It’s important to use a system that makes delivering your videos easy and fast, so you can share your content as soon as it’s ready.
The Rollout
Now, our video ad is live on Instagram, Twitter and Facebook. Check them out:
From upload to sales, we power your photography workflow online. Click for a free trial!https://t.co/29OeLagFld
– PhotoShelter (@photoshelter) February 4, 2016
From upload to sales, we power your photography workflow online. Click for a free trial!
Posted by PhotoShelter on Thursday, February 4, 2016
Over time, Joy will measure the video’s impact on our target audience. Are they engaging with the video and sharing it with their friends? Is the video helping PhotoShelter reach a new audience? Is adding video to our Instagram, Facebook and Twitter strategies driving new business? Time and testing will tell!
The Takeaway: After you spend valuable time and resources producing video content, make sure to measure its impact.
The Archive
Now that the project is finished, my footage is backed up on a hard drive, tagged with metadata and uploaded to my cloud-based Libris library. If I ever need to repurpose this footage in the future, I’ll be able to search for it quickly and easily.
This will also be useful if I ever decide to make a blooper reel…
Cover photo by Jon Gorman.