
A well-organized library of photos, videos and other creative assets can help your organization’s communications reach their full potential. It can save you time, money and frustration.
But getting organized is daunting, and it’s hard to know where to start.
The first step is to determine a home for your visual media library. DAM expert Peter Krogh argues that cloud-based systems provide the connectivity, ease of access and economical advantage organizations need.
Your visual media library should meet the needs of your organization, like it does for brands like Visit Greenland, the Sacramento Kings and the purchasing arm for Subway restaurants, IPC.
Once you have determined where your visual media library will live, the real work begins. But it doesn’t have to be overwhelming! Here are 3 easy steps to a media library that works for your organization (instead of making more work for you).
1. Start with your most popular images.
When you think about how your organization stores photos and videos, do you feel like this?
Don’t worry, the thought of getting organized is often worse than the actual process, and the trick is to start small.
Our first tip is to start with your most popular images. Chances are you have countless images spread out over your organization on hard drives, on employees’ computers and in email inboxes. Before you tackle the mountain, go to basecamp. Think about the images you use on a regular basis. This might be your company’s logo, a shot of your campus, a photo that captures your mission. Find those photos first and add them to your library.
If you’re moving to a cloud-based visual media library, you’re starting with a clean slate. Focusing on your most popular images first will allow you to get used to your new system without getting distracted by the clutter. Then, once your library is up and running (and you are familiar with using it), you can start sifting through hard drives and inboxes to fill out the rest of your archive.
2. Determine your file structure.
Starting with your most used images will also help inform your file structure. When you look at this batch of images, what are the groups that emerge?
A cloud-based visual media library with powerful search functionality makes folder structure less important, because you can find the images you need by searching for relevant metadata. However, a logical folder structure can be extremely helpful when you and your teammates or external partners are browsing your library. Let’s take a look at a handful of corporate photo libraries to give you an idea of how other organizations are setting up their file structure.
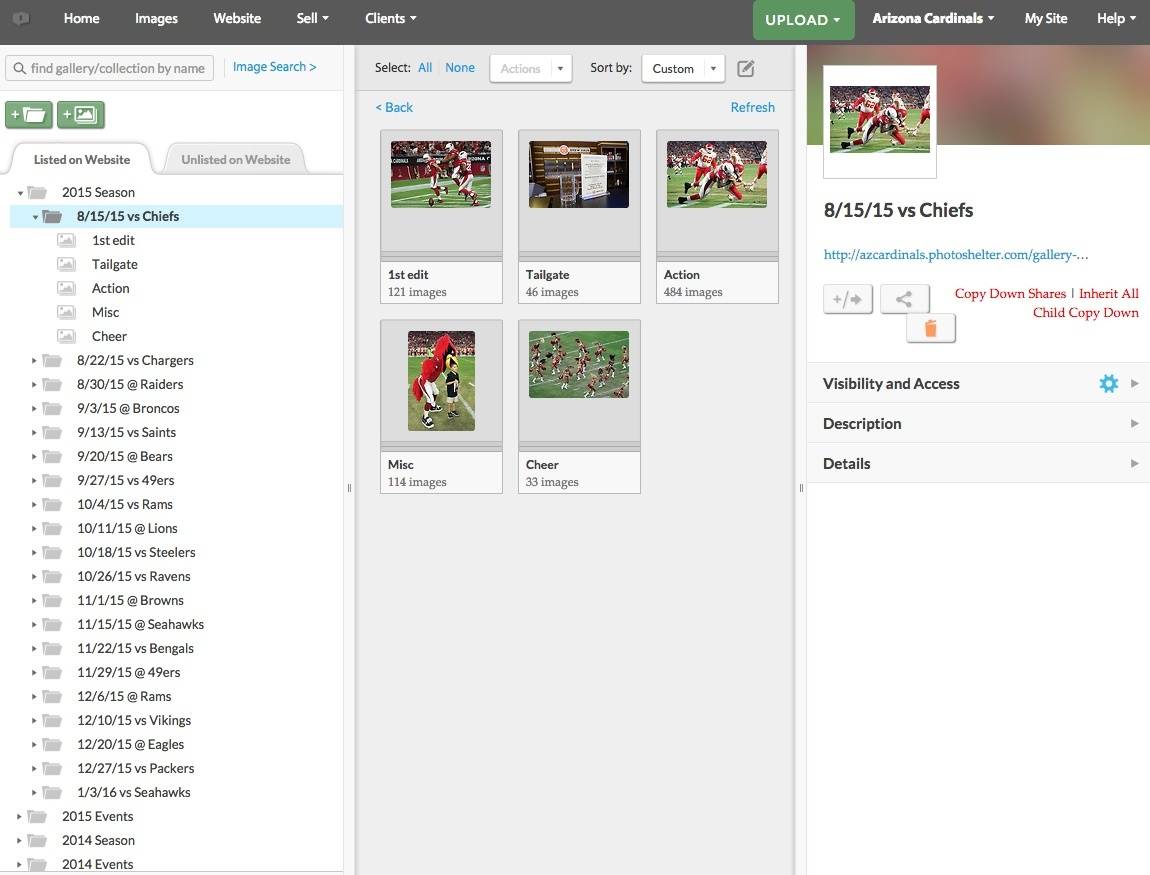
Example #1: Arizona Cardinals
Gene Lower, team photographer for the Arizona Cardinals, organizes his photo library by season, then by game. Within his collections for each game, he creates galleries for tailgate, action, cheer and miscellaneous. If a Cardinals staff member wants a photo of a game’s large crowd, they can easily navigate to Gene’s cheer gallery and pick a photo that fits their needs. (Check out Gene Lower’s Chess Match: Cardinals Photographer Talks Shooting, Technology and Tips.)
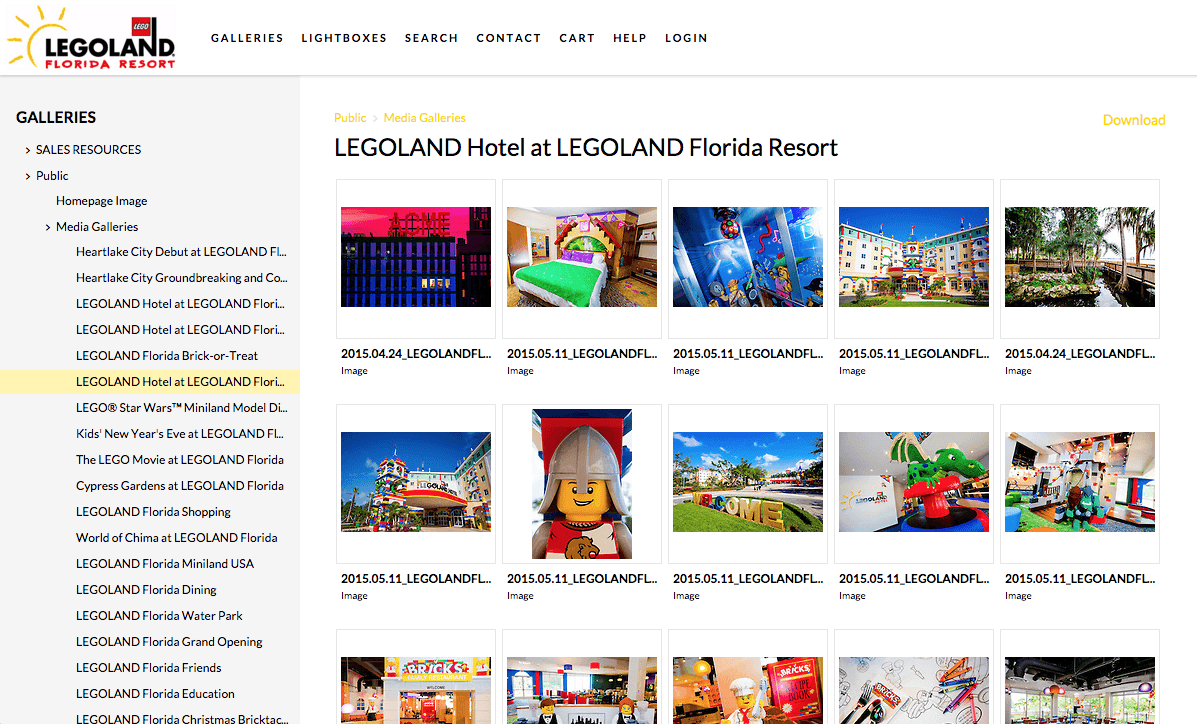
Example #2: LEGOLAND Florida
Chip Litherland, photographer for LEGOLAND Florida, organizes the theme park’s media galleries by events and attractions. If a reporter is looking for a photo of the LEGOLAND Hotel, they can navigate to the hotel’s photo gallery and choose a photo that’s relevant to their story. (Check out How LEGOLAND Florida’s Lightning-Fast Photo Management Boosts Public Relations.)
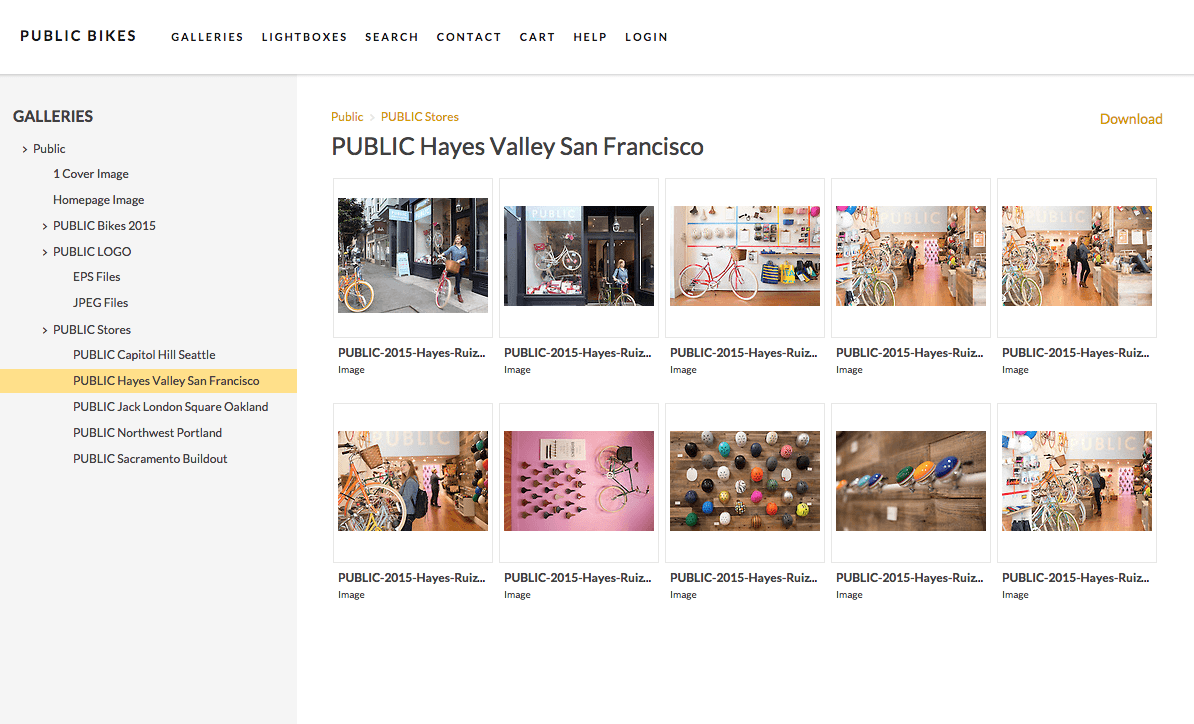
Example #3: PUBLIC Bikes
PUBLIC Bikes Visual Designer, Nicole Faraclas, organizes the bike retailer’s photos into collections called “PUBLIC Bikes 2015” (which is filled with galleries for each type of bike PUBLIC sells), “PUBLIC LOGO” and “PUBLIC Stores.” The structure is clear and simple, making it easy for internal staff members and external partners to find the photos they need. (Check out Banana Republic + PUBLIC Bikes = Powerful Visual Communication.)
3. Tag your images with metadata.
Step three is to leverage the power of metadata to make your library easily searchable.
Keywords are an easy place to start because we all use keywords to search the internet on a regular basis. When you’re tagging a photo, think about the situations in which you would need to find the photo and the words you would use to search for it.
For example, I might use the photo below for a promotion for a golden hour photography tour, so I’ll be sure to tag it with the keyword, “golden hour.”

For more keyword tips, check out Keywords: A Better Way to Organize and Access Your Photo Library.
But metadata is more than keywords. Check out the screenshot below of a photo and its metadata from Chick-Fil-A’s visual media library. The metadata includes the location, a photo credit, model release information and a contact address.
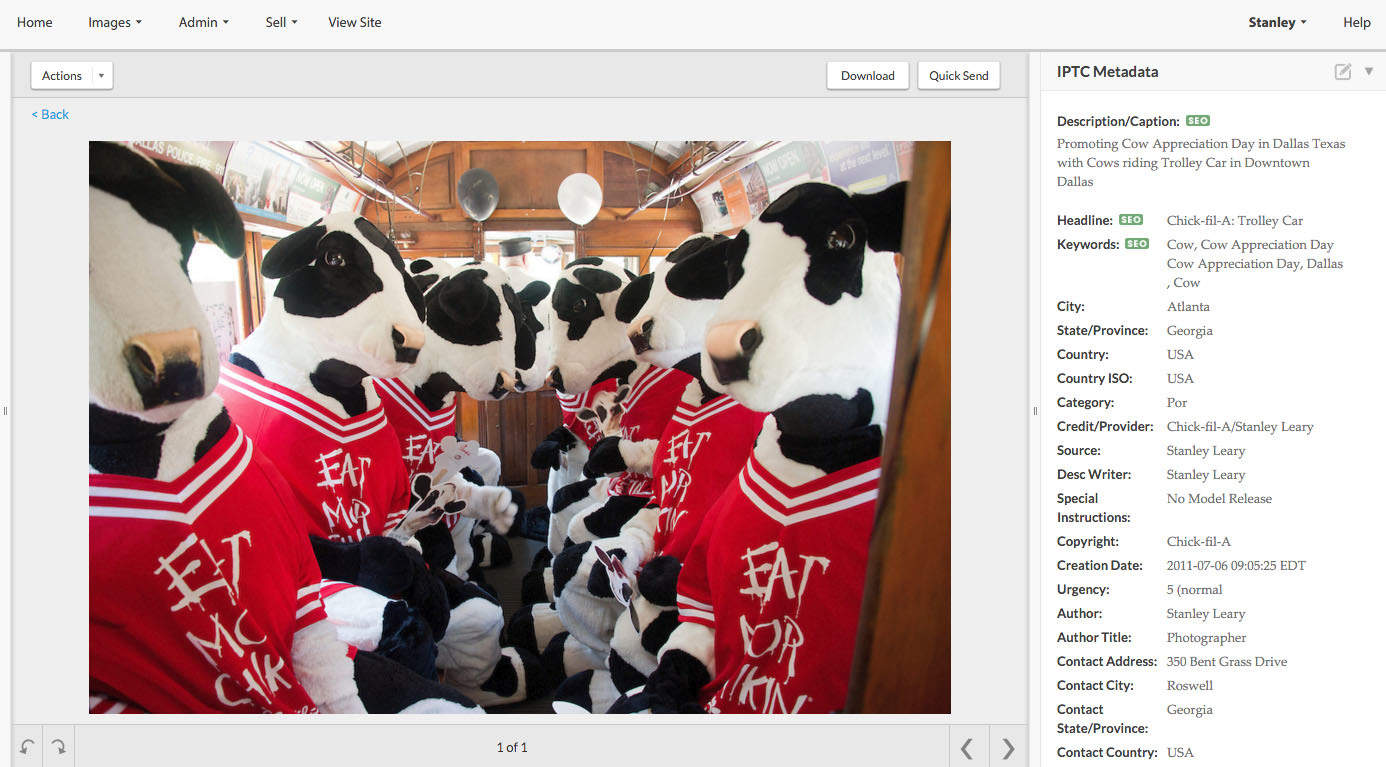
As DAM consultant and Chick-Fil-A visual storyteller Stanley Leary explains in this clip, the more information you attach to a photo, the easier it will be for you to find it and use it in the future. (Check out Meet the Visual Asset Manager Behind Chick-Fil-A’s Communications.)
The Takeaway
By following these three easy steps, you can get your visual media library off to a great start and become familiar with the basics of digital asset management. The return on investment will be a shiny and clean visual media library that streamlines your workflow and helps you avoid the Content Apocalypse. You’ll stop wasting time looking for images, and you’ll ensure that you’re not doubling your costs and efforts by reproducing visual assets you already have. Taking these three easy steps in the short term will make your job easier (and reduce your headaches) in the long term.
Cover photo by Kristin Twiford.