Your brand’s media is extremely valuable, which means you need to have a high level of control over what happens to every creative asset in your library.
Some assets need to be available to a wide range of people. For example, a university may need to share a set of on-brand campus images with reporters, faculty and student groups hosting events on campus.
But some assets need to be kept private, like old outdated images or projects that are still in progress.
In PhotoShelter for Brands (formerly Libris), you have complete control over who can see and download your photos, videos, audio files and more.
Watch the video to get a better understanding of visibility and access, and see how you can make some collections visible to everyone, and others invisible.
Please note: PhotoShelter does not actually give you the power to apparate, or magically teleport like Harry Potter. However, it does allow you to make collections and galleries (magically) appear and disappear.
Now, let’s break it down. Read through the basics of visibility and access, or scroll to get our pro tips.
The Basics: Visibility and Access
Your PhotoShelter account has two sides, the Library and the Portal.
The visibility and access permissions you set in the Library determine who can see and download what on the Portal. You can choose whether you want your collections and galleries to be visible to everyone, just those with permission, or no one at all. And, you can set different permissions for each collection or gallery (or you can have collections and galleries inherit permissions from a top-level collection – but we’ll get into that later).
That means three important things:
- There’s only one Portal, but it may look different to different people, depending on the permissions you (the admin, editors and taggers) have granted them
- The Portal may have a bunch of collections and galleries that are visible to everyone (if you’ve set the permissions to “everyone”)
- The Portal can have no public collections and galleries (if you’ve set all your permissions to “those with permission” or “no one but me”)
You can see your visibility and access settings at a glance in the lefthand pane of your PhotoShelter Library.
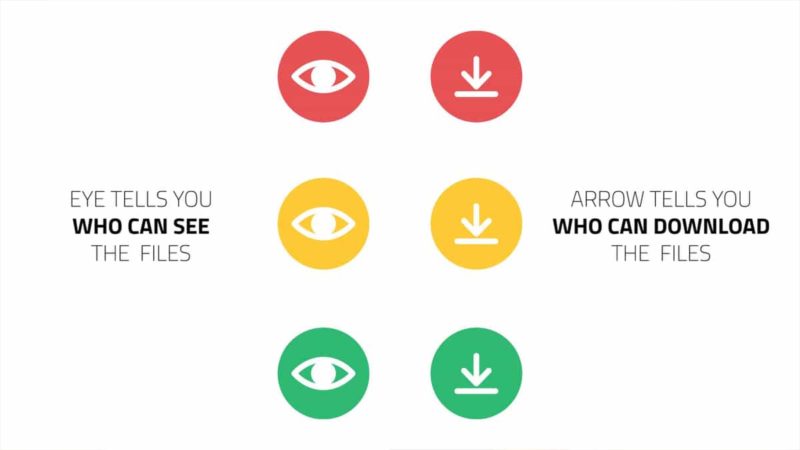
Each gallery and collection has a set of two icons, an eye and an arrow, that tell you who can see and download the files inside. The icons are colored like a stoplight: green for “everyone,” yellow for “those with permission,” and red for “no one but me.”
Note: Your visibility and access settings do not have to match. For example, you could allow everyone to see a gallery, but only allow those with permission to download.
Visibility
The eye icon tells you who can see a collection or gallery.
Green Eye: A green eye means everyone can see it when they visit your PhotoShelter Portal.
Yellow Eye: A yellow eye means only those with permission can see it when they visit your PhotoShelter Portal. You can grant permission to specific invited users or groups of invited users, or by setting a password.
Red Eye: A red eye means no one can see it on the Portal. Only your admin, editors and taggers can see it in your Library.
Access
The arrow icon tells you who can download the files inside your collections and galleries.
Yellow Arrow: A yellow arrow means only those with permission can download the files inside. Again, you can grant permission to specific invited users or groups of invited users, or by setting a password.
Red Arrow: A red arrow means no one can download the files inside. Of course, your admin, editors and taggers can download the files on the back end of your Library, but no one can download from the Portal.
3 Pro Tips for Advanced PhotoShelter Users
Feel like you’ve got a handle on visibility and access, but want to get our team’s tips and tricks? Check out these pro tips.
1. Create nested collections and galleries that inherit permissions.
In your Library, you can set up a top-level collection, then create nested collections and galleries within that collection. If you select “inherit permissions” on those nested collections and galleries, you can save time and effort.
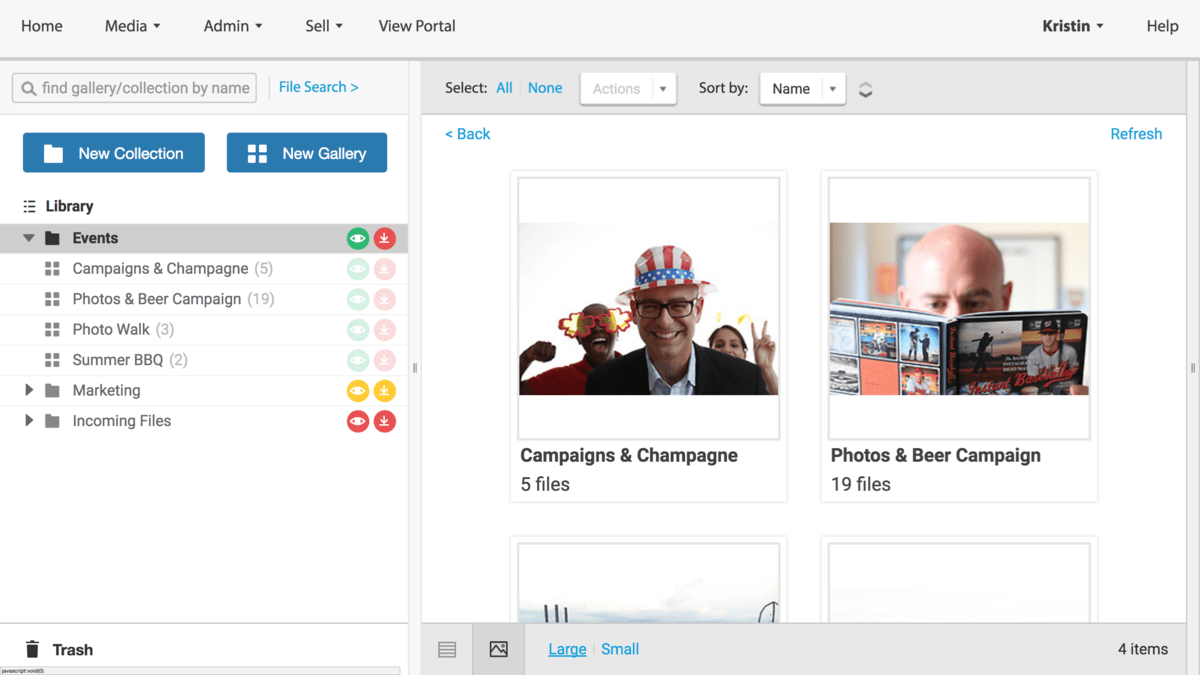
You may want to use this because you want all of your photos from special events to be visible to everyone who attended them. In this case, you would set the visibility of your top-level “Events” collection to green (“everyone can see”) and then have nested galleries for each event inherit permissions from that collection.
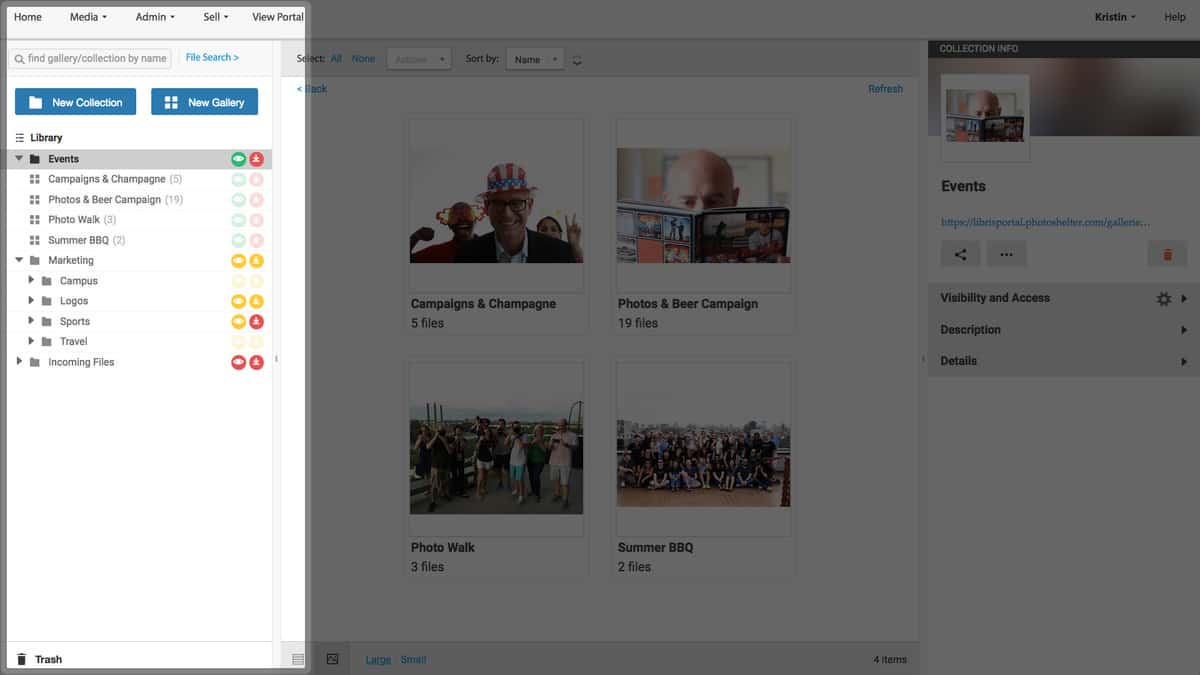
You can see this at a glance in the lefthand pane: any collection or gallery that is inheriting permissions will have stoplight eye and arrow icons that are greyed out.
Check out the image below to see how the galleries nested under the “Events” collection are inheriting permissions.
2. Set different download access permissions for different types of files.
When you’re granting someone permission to download the files within a gallery, you can choose different settings for different types of files.
Check out the example below, where I’ve given my invited user, Todd, permission to download the original files for images and audio files, and the high res MP4 files for videos. But, I haven’t given him permission to download other files, like my Adobe InDesign or Premiere Pro projects.
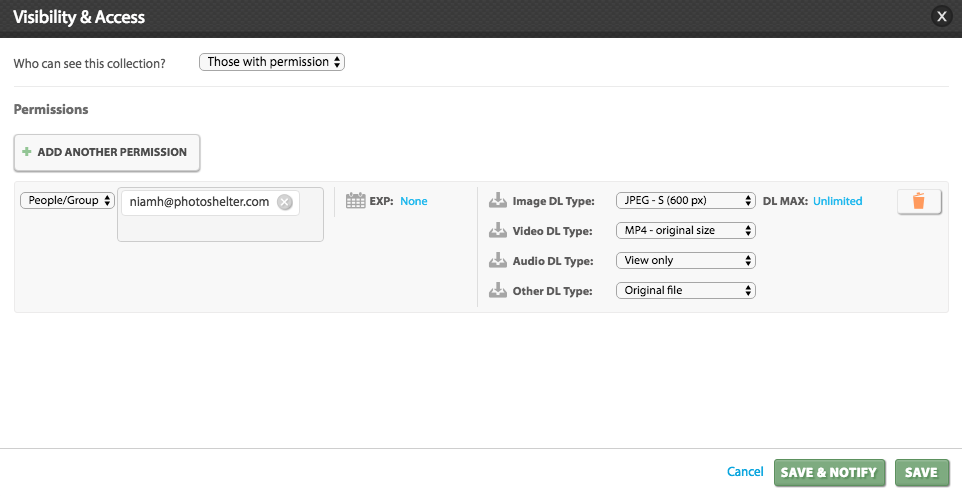
With these granular permissions settings, you have a high level of control over your assets.
3. Base your folder structure and organization on your permission and access goals (if that works for your team).
Many PhotoShelter clients organize their collections and galleries based on who needs access to the content inside them.
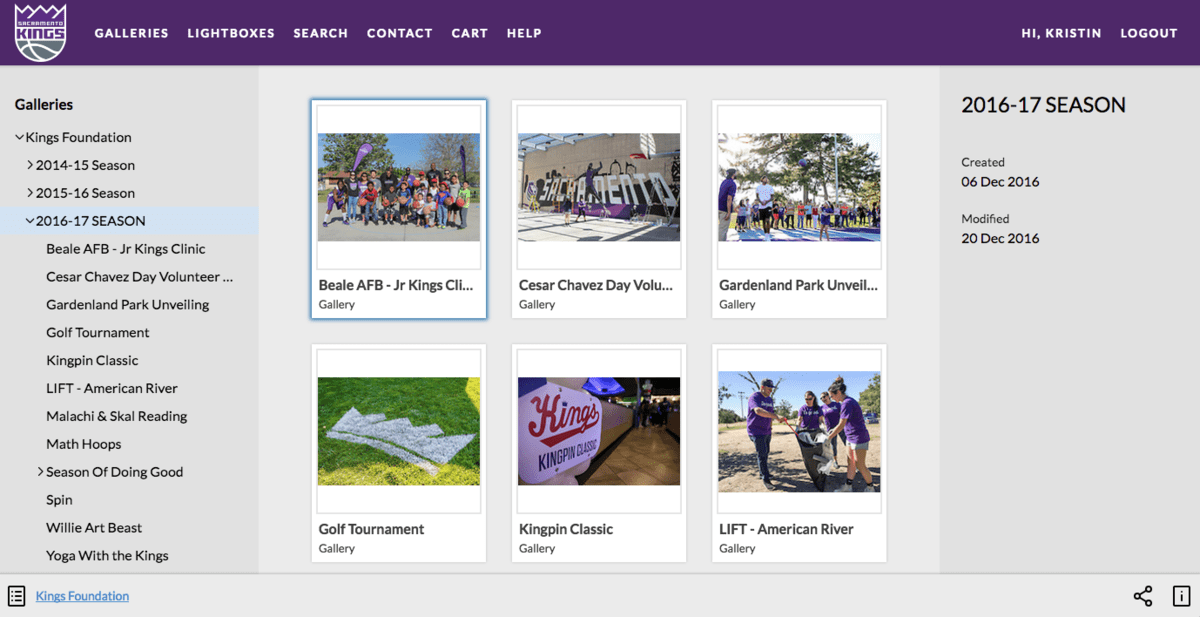
For example, the Sacramento Kings set up top-level collections for each departments, then create nested galleries and collections that inherit permissions. This way, whenever someone from the Kings Foundation needs a new photo for a campaign, they can check the “Kings Foundation” collection, navigate to the “2016-2017 Season,” and browse galleries with photos from each event. Anytime a new set of photos is uploaded to this collection, everyone with access to that top-level collection automatically has access.
Learn more about how the Kings get organized and power their visual storytelling in our behind the scenes webinar, Tips and Tricks with the Most Innovative Team in Sports!
Note: This doesn’t work for everyone, and you have to decide what works best for your team – every brand’s media library is unique!
Ready to have some fun with visibility and access? Head into your PhotoShelter account to get started!